Skip to content

Lucas is Das Bloggin' Posts

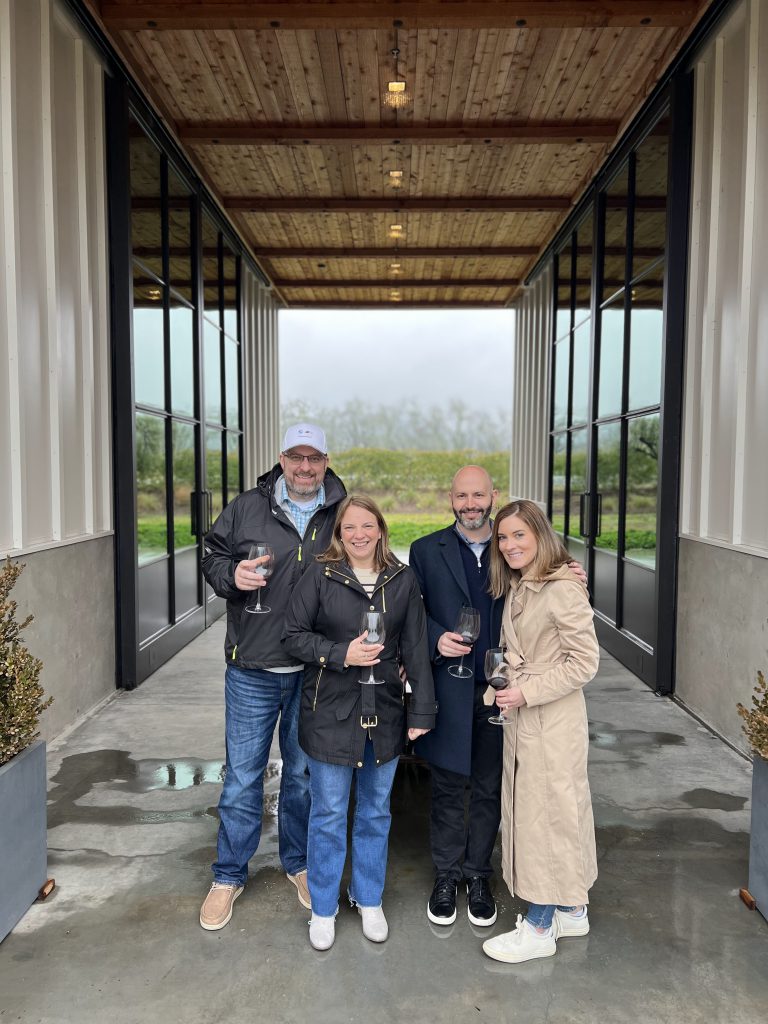
A Rainy but Unforgettable Weekend in Napa & Healdsburg

(A Story of Wine, Food, and a Guy Named Silver Steve)


Day 1: Arrival in San Francisco and the Journey to Wine Country

Flying into San Francisco International Airport (SFO), we picked up our rental—a sleek BMW 5 Series from Sixt. At just $200 total for our entire trip, it was a steal, and as a BMW enthusiast, I couldn’t have been happier. There are some KILLER roads in the area with seemingly too high of speed limits 🙂 Sixt consistently offers a top-notch experience, especially for luxury vehicles. It’s the only place I like to rent from.

Exploring Fisherman’s Wharf

We made a pit stop at Fisherman’s Wharf to see the famous sea lions. Arriving around 11 AM on a Thursday, the area was pleasantly uncrowded, though a school group was present, providing an impromptu educational experience about the sea lions’ post-earthquake migration to the wharf. The sea lions were loud, entertaining, frankly hilarious, and surprisingly, not too smelly.

Crossing the Golden Gate Bridge

Our next adventure was driving across the iconic Golden Gate Bridge. Despite the heavy fog that morning, the bridge’s grandeur was undeniable. While many hail it as a marvel, to me, it was a beautiful yet functional piece of infrastructure. In other words, “it’s a bridge“.

Lunch in Sausalito

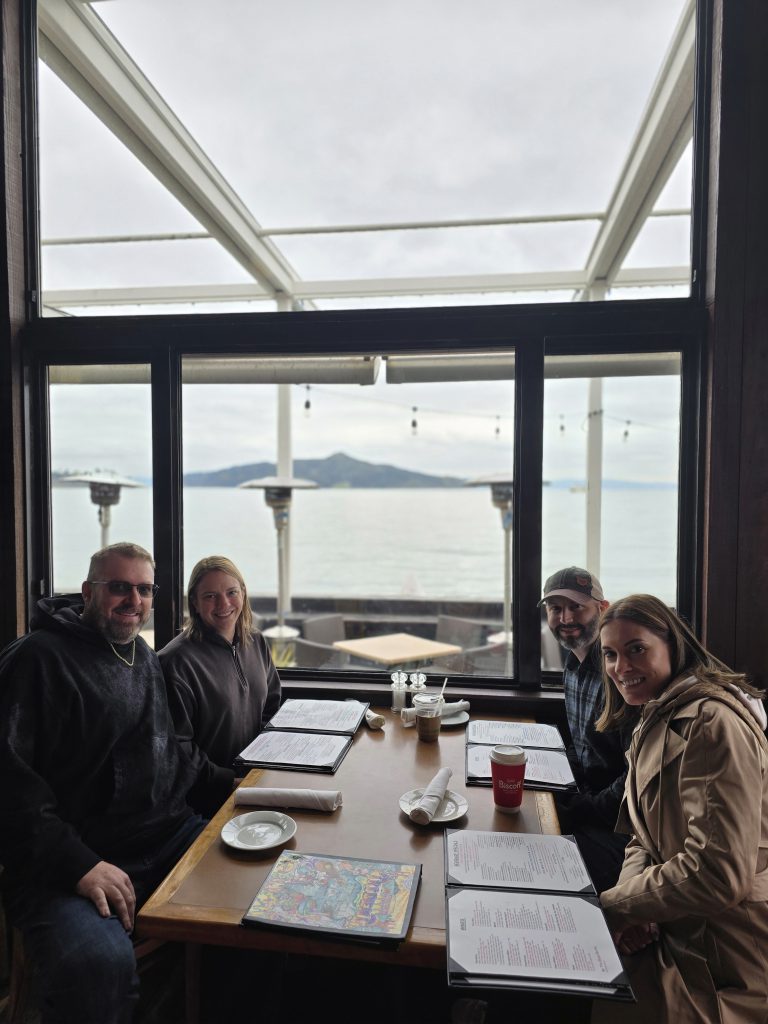
Continuing our journey, we drove through the quaint town of Sausalito. With its charming, colorful hillside houses, Sausalito offered a serene contrast to the bustling city. We decided to have lunch at The Trident, a waterfront restaurant with ties to San Francisco’s renowned Buena Vista Café. Opting for the clam chowder bread bowl and their famous Irish coffee, the meal was satisfying, earning a solid 6/10 in my book. The view from our table, overlooking the bay and Alcatraz, added a special touch to the experience.
Afternoon Wine Tastings

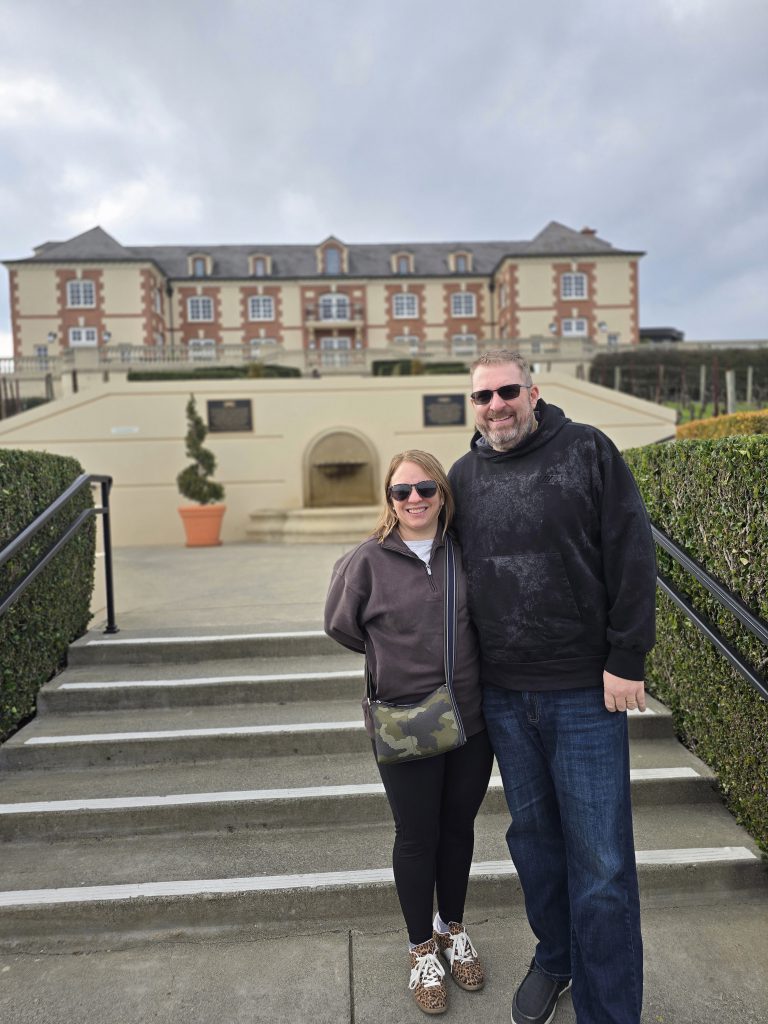
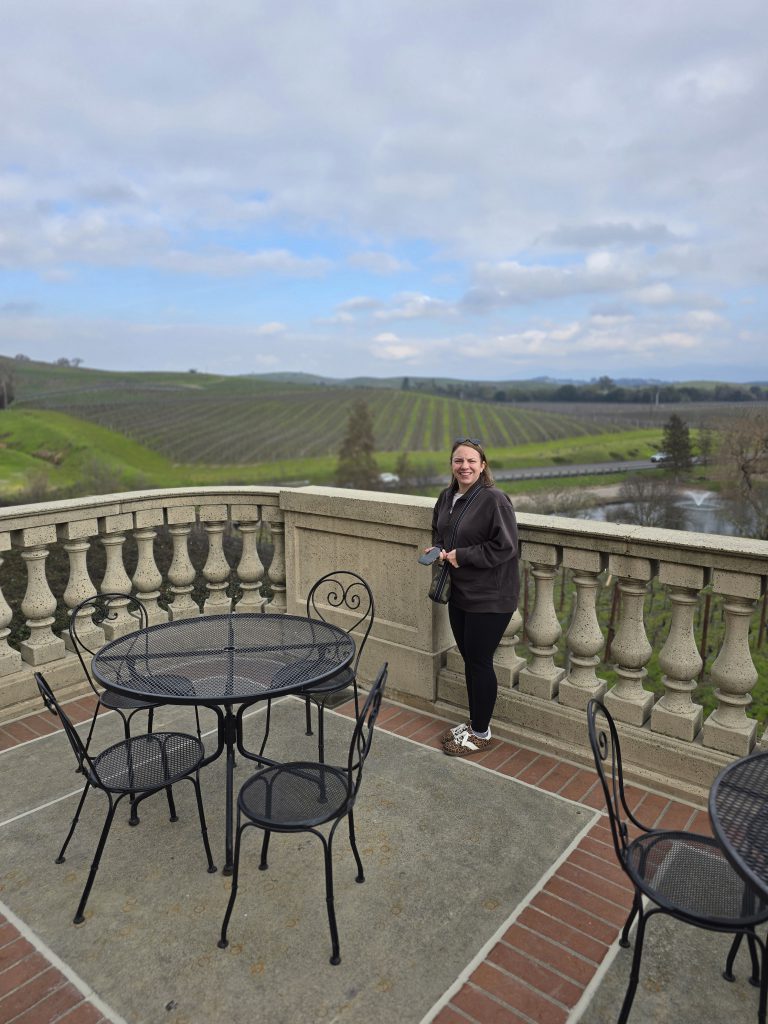
Post-lunch, we embarked on our first wine tastings. Our initial stop was Domaine Carneros, established in 1987 by Champagne Taittinger. The estate, modeled after Taittinger’s Château de la Marquetterie in France, is undeniably beautiful. However, the experience felt a bit commercial, and the sparkling wines, while decent, didn’t particularly stand out.

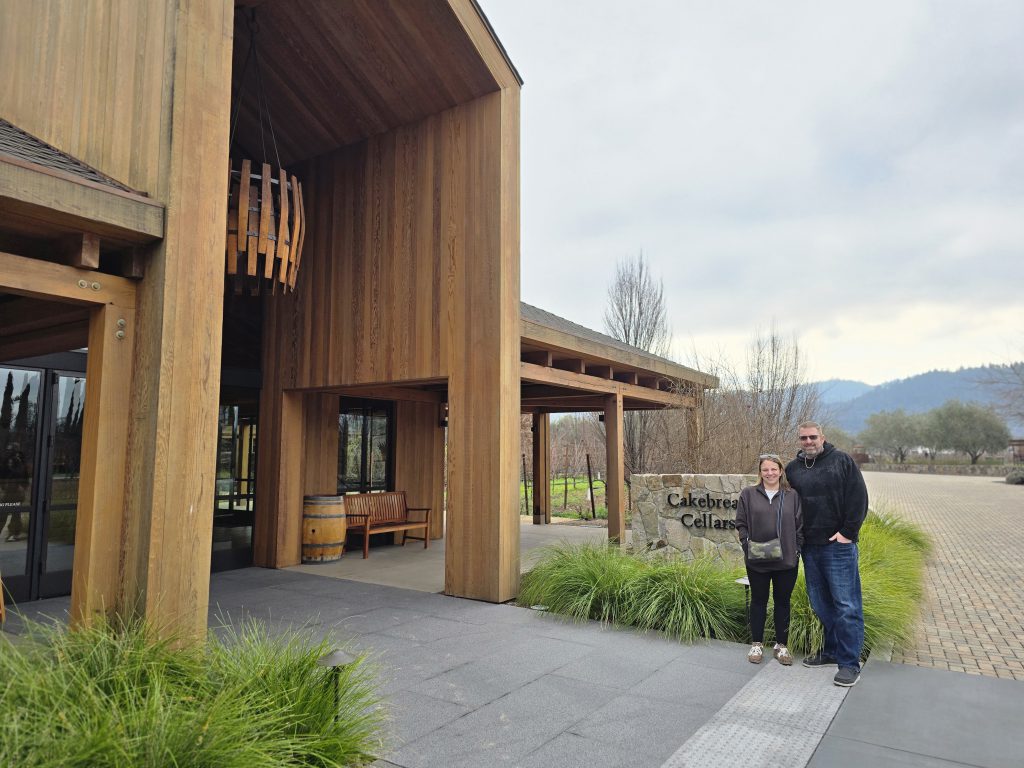
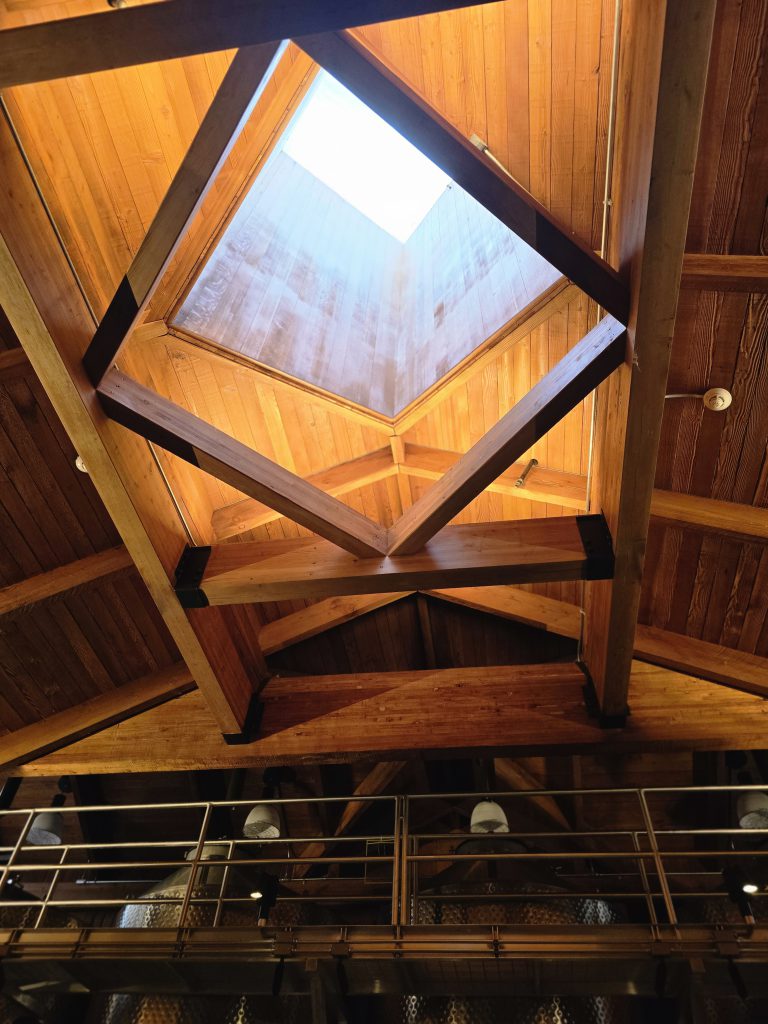
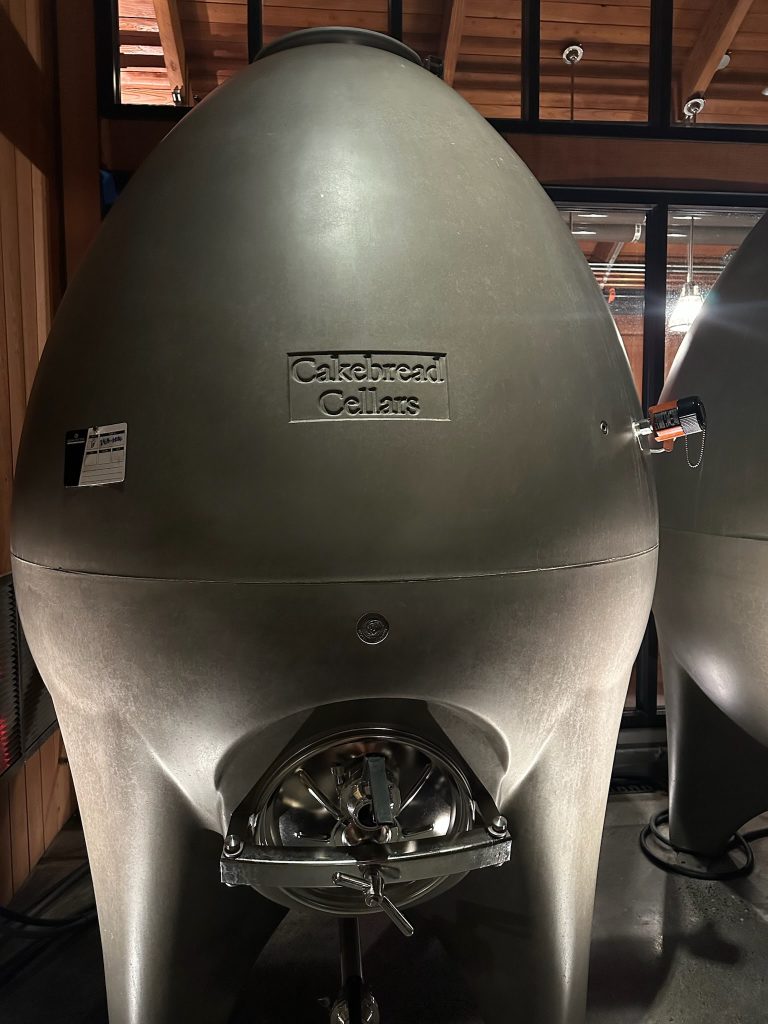
Next, we visited Cakebread Cellars, a winery with a rich history dating back to 1973. Founded by Jack and Dolores Cakebread, the winery has been a pioneer in Napa Valley’s transformation into a premier wine region, a true “anchor of the valley”. The tour was engaging, and I was particularly intrigued by their use of concrete egg fermenters—a unique approach I’d not encountered before. Although we didn’t purchase any wine at the time, a decision I later regretted, the experience was memorable. We will be ordering online.
Arrival in Healdsburg

As evening approached, we made our way to Healdsburg and checked into the Hilton Lodge. Being loyal Hilton members, we utilized our points for the stay. The hotel exuded luxury, featuring a fireplace and a soaking tub in our room. Despite the cold and rainy weather deterring us from using the balcony, the amenities provided a cozy retreat. The only drawback was the shower’s compact size, which proved a bit challenging for someone of my stature, but even for my tiny wife it was a struggle.

Dinner at Bravas de Tapas

For dinner, we chose Bravas de Tapas, a Spanish restaurant known for its inventive take on classic dishes. The ambiance was cozy, and the food was delightful. Standout dishes included the long-cooked pork cheeks with salsa verde, creamy chicken croquetas, and Dungeness crab-stuffed piquillo peppers. While the paella was a bit underwhelming—lacking the desired crispy rice crust and flavor depth—the overall experience was commendable, earning an 7/10. Sharing multiple small plates is our preferred dining style, and Bravas delivered beautifully.

After an eventful day, we returned to the hotel to rest, eager for the wine adventures awaiting us the next day.


Day 2: The Ultimate Wine Tour with Silver Steve

Why you need a guy like Steve

If you’re visiting Napa and think you can just wing it, let me stop you right there. Gone are the days of rolling up to a winery, casually strolling in, and asking for a tasting. Now, it’s all reservation-only, and the best spots book up weeks in advance. Enter Silver Steve from Silver Service Tours—the undisputed MVP of our trip. I can’t stress this enough.

We found Steve through a mutual friend, Brad Alvord, and let me tell you—this guy is a legend. A retired pro with an encyclopedic knowledge of wine country, Steve handled everything: planning, reservations, logistics, and keeping us comfortable in his custom-built Mercedes adventure van or Land Rover Defender if you prefer (waters, umbrellas, Kleenex—he had it all). And most interesting of all? No GPS. This man knew every winding road, every shortcut, every winery owner.

Steve even made impromptu changes on the fly to the itinerary based on the current weather conditions and was very thoughtful about it. That’s how good he is, and you as a tourist can’t pull that off.

Trust me—you don’t want to drive yourself in Napa, especially if you’re doing it right. We had a full-day lineup, and there was no way we were attempting it on our own.

Morning Coffee – Plank Coffee, Healdsburg

Before diving into wine, I needed coffee.

I stopped at Plank Coffee, a small local café in Healdsburg known for its organic, small-batch roasts. Coffee was solid—no complaints there. The food, however, was all vegan. Nothing against vegan food, but when you’re about to spend the day drinking big, bold Napa reds, you kinda want eggs, bacon, and something substantial.

So, we grabbed breakfast sandwiches from the hotel instead and hit the road.

Stop #1: Schramsberg – Deep in the Caves of Bubbles

We kicked off the day with something unique—Schramsberg Vineyards, one of the oldest and most legendary sparkling wine producers in California. Established in 1862, their wines have even been served at the White House for over 50 years. If you think Napa is all about Cab, this place will change your mind.

But the real star here? The caves.

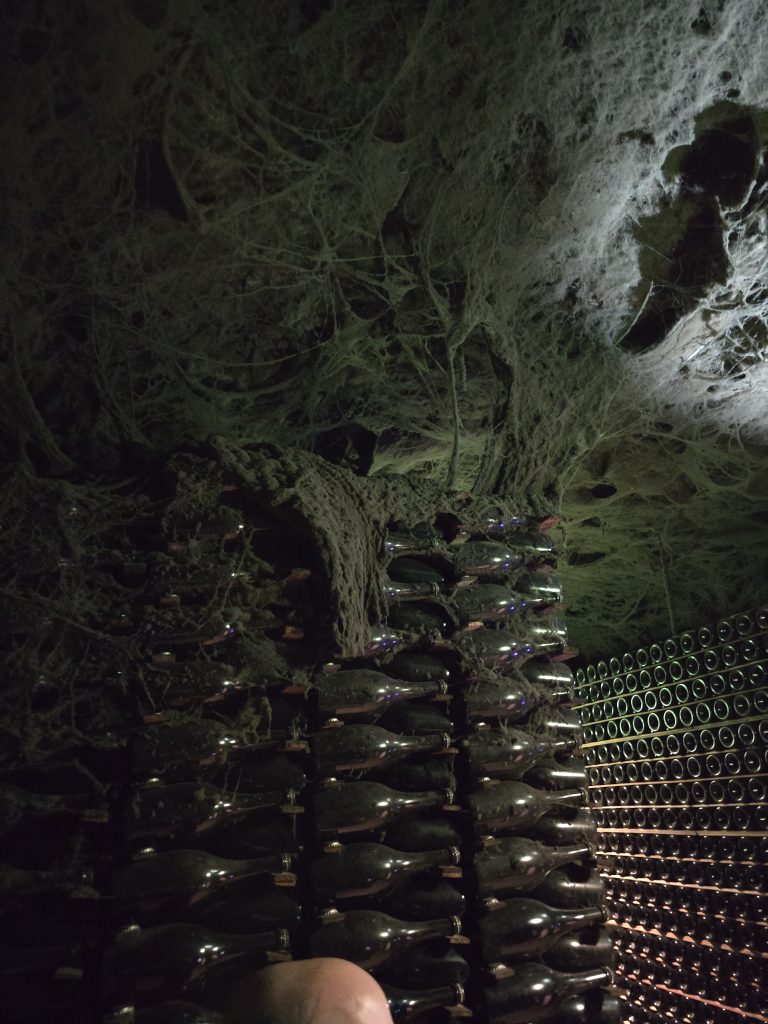
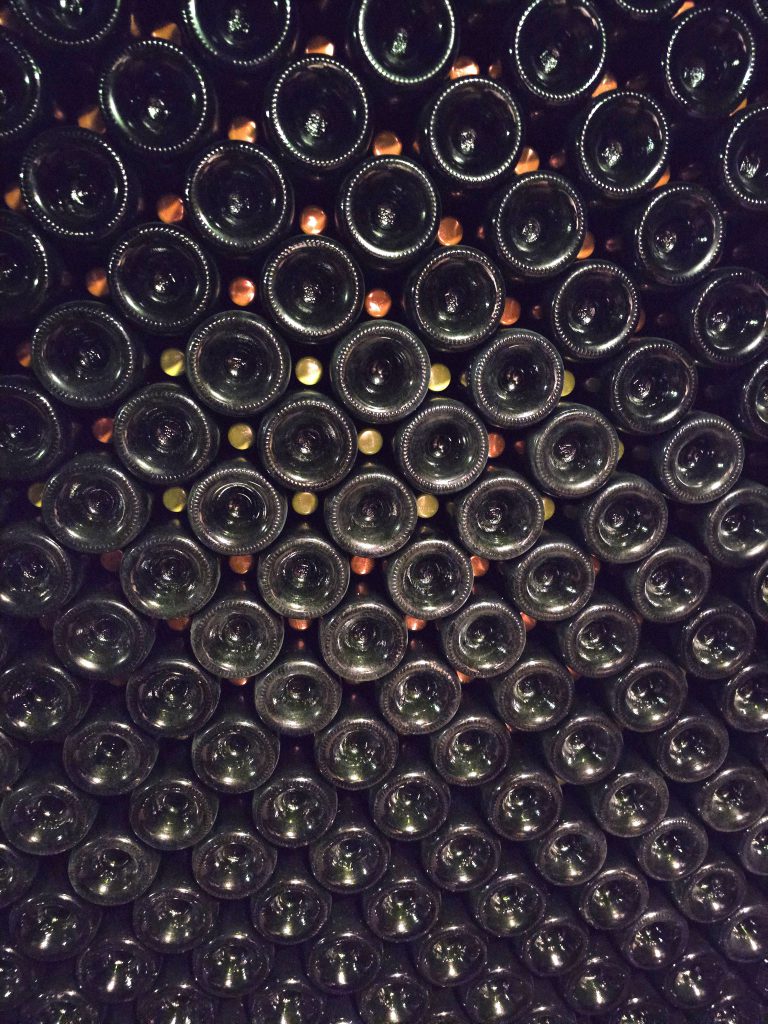
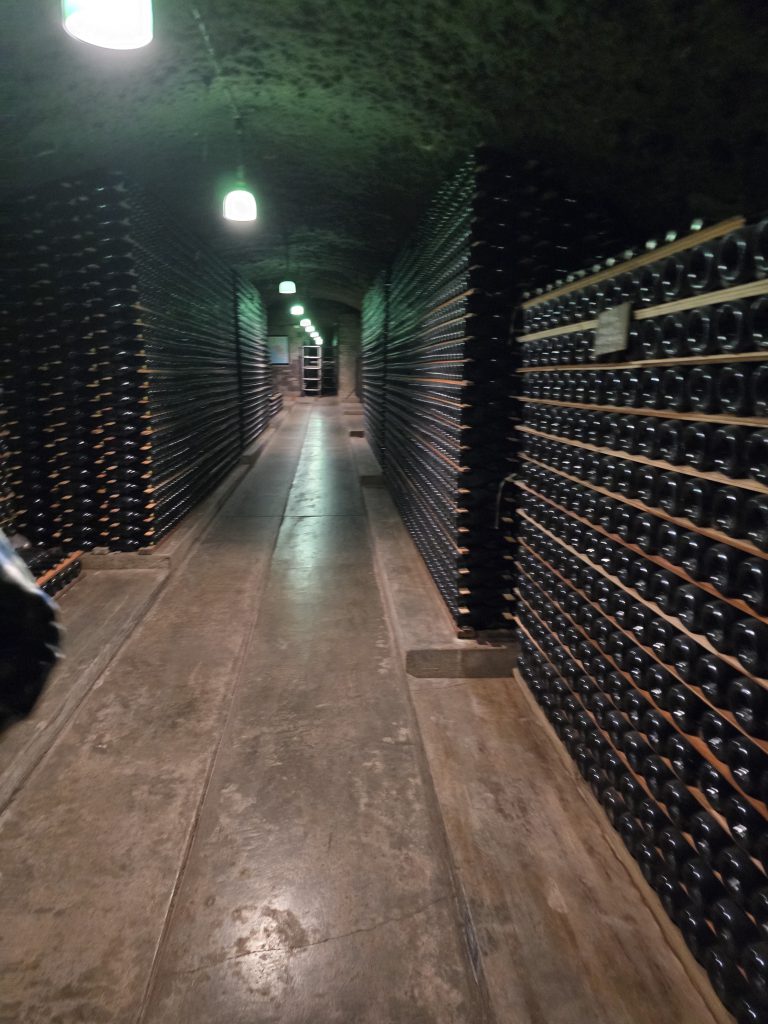
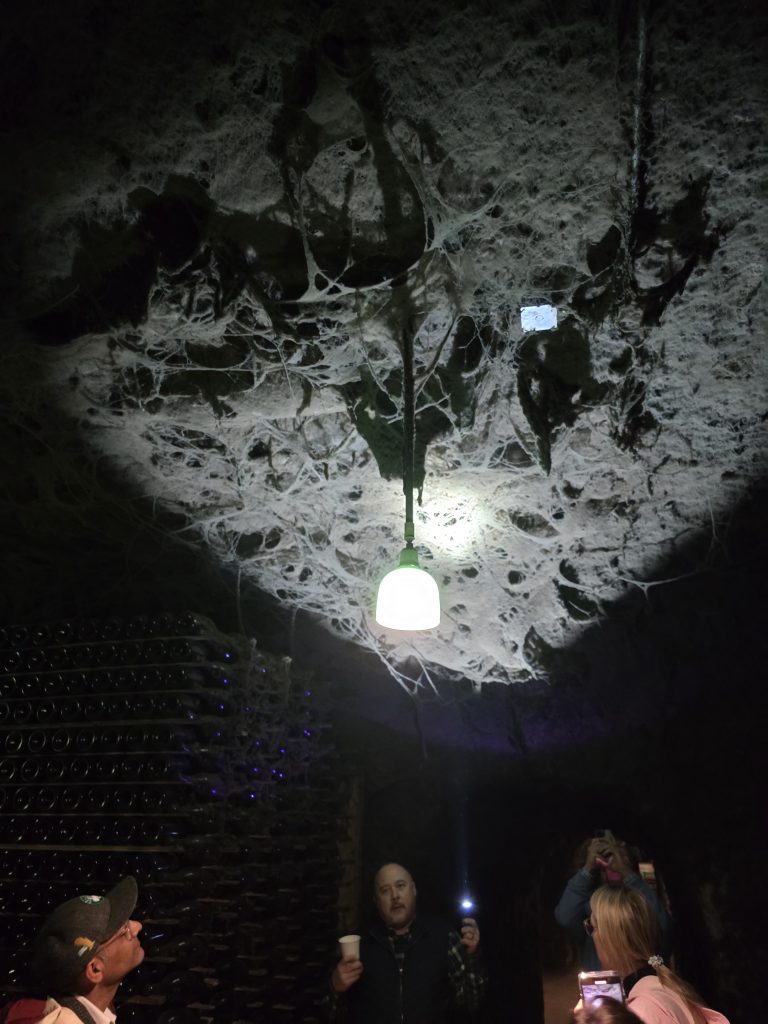
And when I say caves, I don’t mean a cute little tasting room with some dim lighting. I mean miles of hand-dug tunnels from the 1800s, lined floor-to-ceiling with free-stacked bottles, some of which were 80 deep. The walls were covered in a natural lichen that acts as the oxygen filtration system—no HVAC needed. The whole place felt like something out of Transylvania.

We walked through real candlelit corridors that I assume act as a simple “canary in a coal mine” (like if those go out, there’s no oxygen, so you might want to leave), learning about méthode traditionnelle—the painstaking Champagne-style process they use to make their sparkling wines. The craziest part? They still hand-turn every bottle (thousands of them) one by one to keep the yeast sediment moving.

Tasting-wise, we loved everything. We joined the club on the spot. 9/10 experience.
Lunch at V. Sattui – A Nostalgic Italian Picnic

For lunch, Steve had a few ideas, but I pulled an audible and requested V. Sattui, a spot I remembered loving 20 years ago. They’re known for their Italian market filled with fresh sandwiches, cheeses, and an assortment of wine-friendly snacks.

Unfortunately, construction had other plans.

The once-great market had been relocated to a temporary trailer, and the hot food was coming from a food truck. Combine that with the cold, rainy weather, and the usual vineyard picnic vibe was pretty much nonexistent.

Still, we made the best of it. We grabbed a bottle of Gamay Rouge, a semi-sweet, cranberry-forward wine that I loved 20 years ago. This time? Tastes change. It was a little too sweet for my palate now, but still enjoyable, especially for lunch in the midst of tasting all big bold stuff all day.

Rating? 7/10 for nostalgia. Had the weather and construction been different, it probably would’ve been an 8.

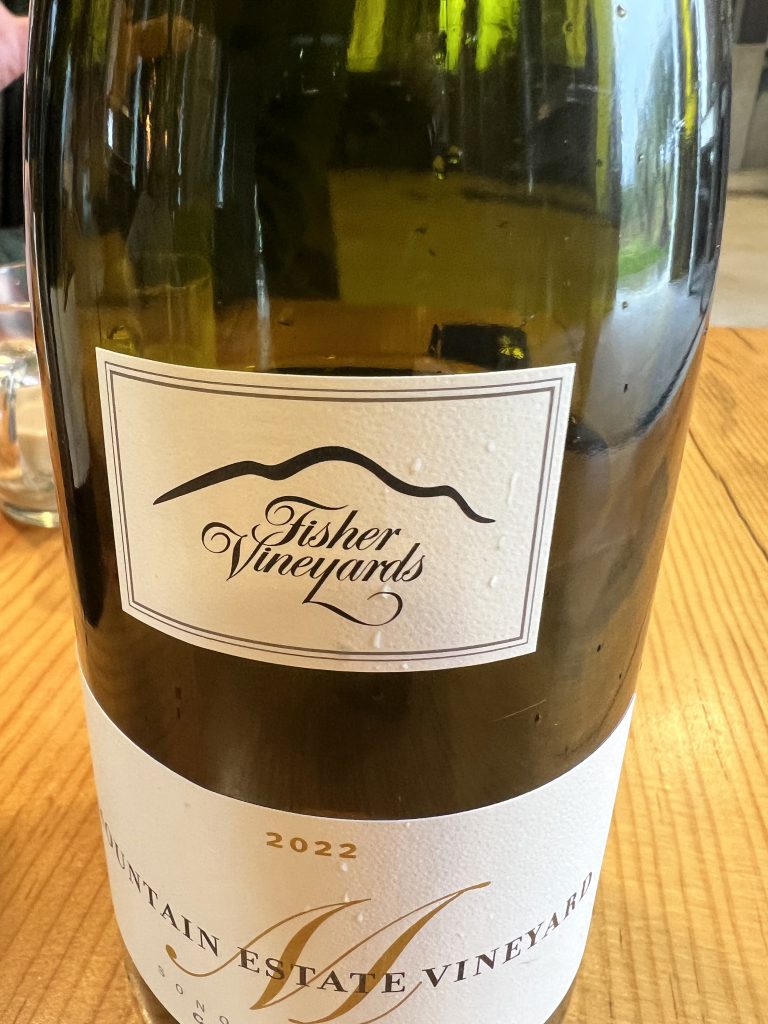
Stop #2: Fisher Vineyards – The Hidden Gem of the Trip

You ever have that moment on a trip when you realize this is the place you’ll be talking about forever? That was Fisher Vineyards for us.

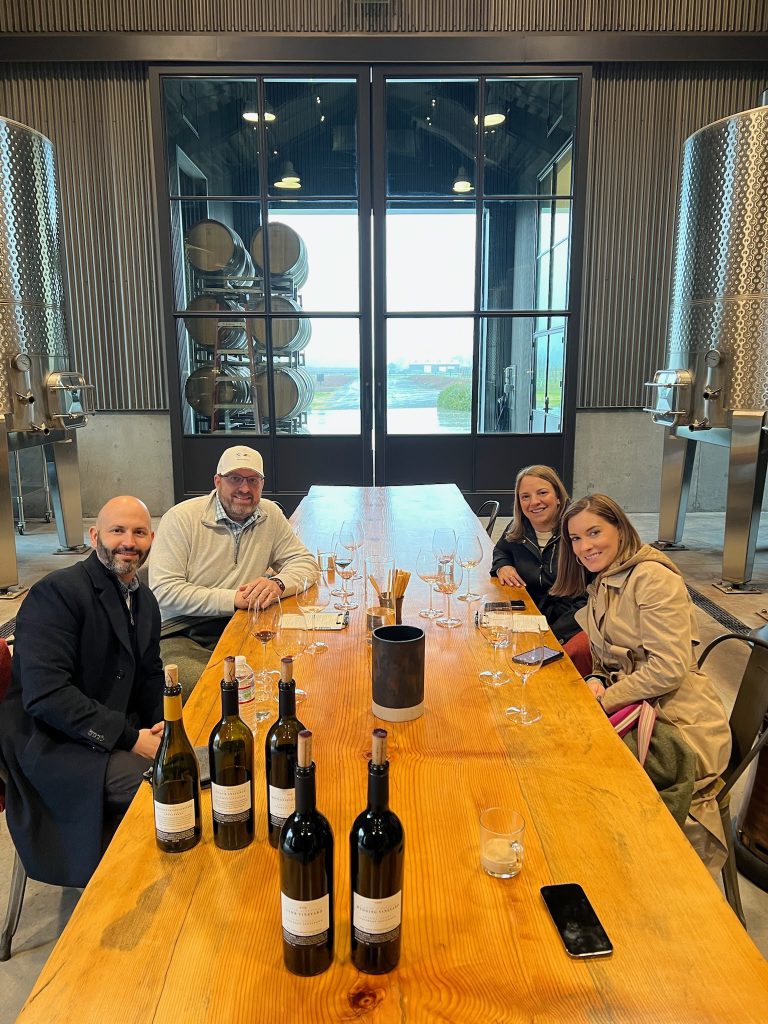
This small, family-run winery completely stole the show. Unlike some of the bigger, commercial places, Fisher is tiny—just 28 employees do EVERYTHING. No outside contractors, no mass production, just a team that lives and breathes wine.

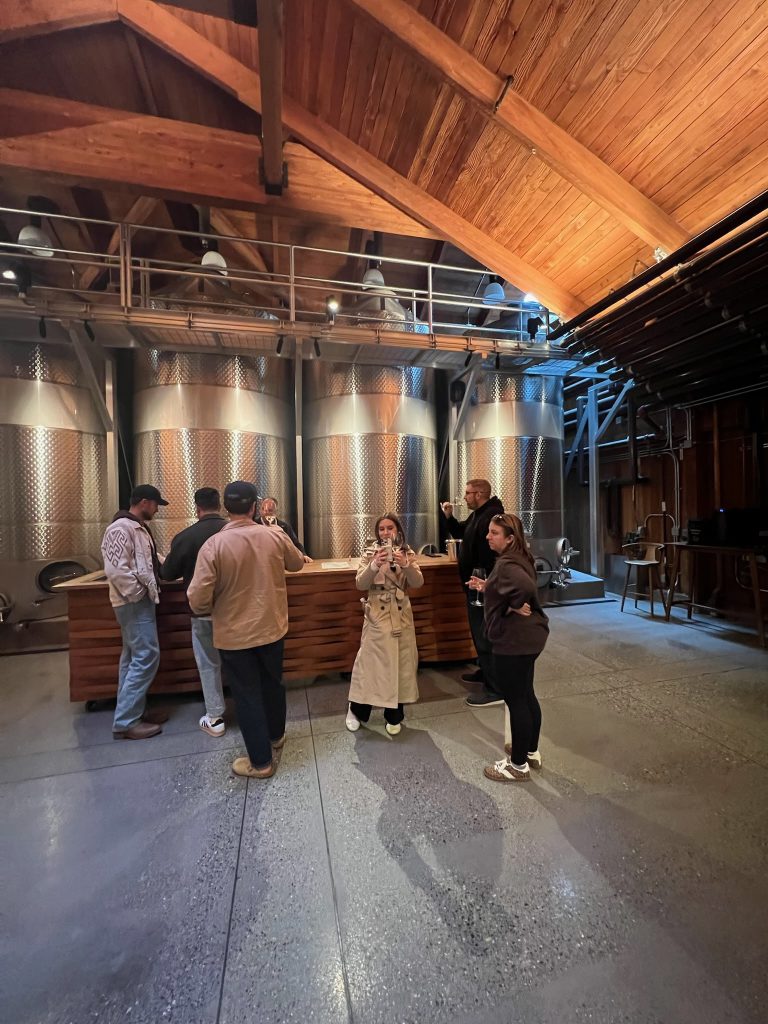
We were welcomed by Erik, our host, who had a stunning private setup right in the middle of the fermenters and presses. It felt like a VIP experience from the jump. The wines? Absolutely insane. We tasted through their lineup, talking in-depth about their old-world winemaking approach while sitting inside the heart of their production facility.

Erik noticed my BMW hat and we immediately hit it off, swapping car stories for half an hour. By the end of the tasting, we were exchanging numbers like old friends. I’m working on getting him to come to Ohio to offer wine tastings at our country club.

Not surprisingly, we joined the wine club. 10/10—must visit.
Stop #3: Chateau Montelena – A Piece of Napa History

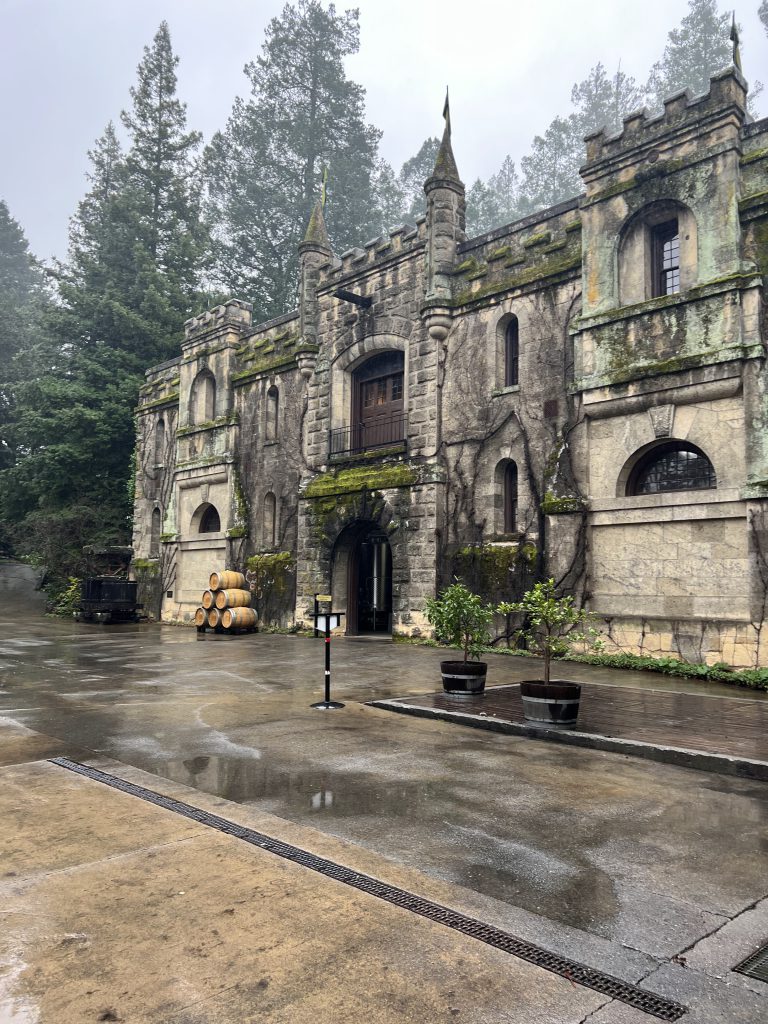
Our last stop of the day was Chateau Montelena, one of the most iconic wineries in Napa. If you’ve seen Bottle Shock, you know its legendary backstory—this is the winery that put Napa Valley on the map by winning the Judgment of Paris in 1976, a moment that stunned the wine world and proved that California could compete with France.

The estate itself is stunning, with a beautiful stone chateau and serene lake, making it one of the more picturesque wineries we visited. However, the tasting experience was a bit different from what we had grown to love over the trip. Instead of the intimate, sit-down tastings we had at Fisher and Schramsberg, this was more structured—a classic bar-style tasting with a group. For first-time visitors to Napa, it’s a fantastic introduction, but for those who love deep-dive, conversation-driven tastings, it felt a bit less personal.

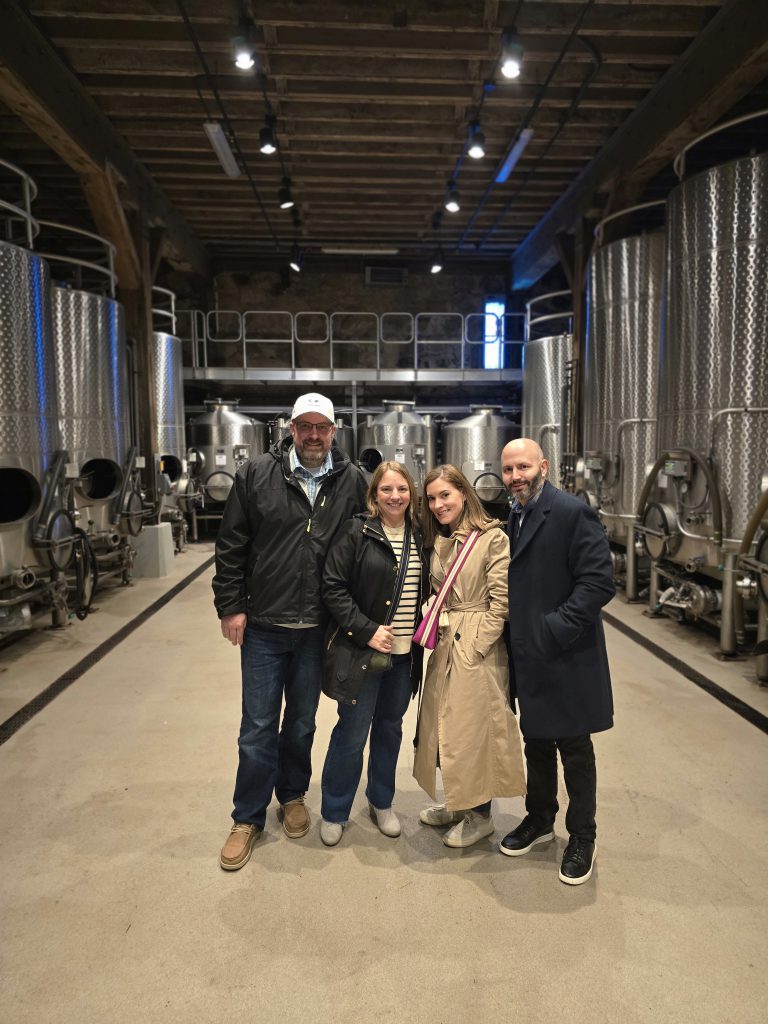
That said, we had a cool unexpected bonus. When we mentioned our connection to Chateau Montelena through our St. Damien’s Hospital fundraiser (where former owner Judy Barrett generously donates wine for our auction), their head of hospitality, Mark, came out to personally greet us. He even took us on a private tour of the fermentation room and shared some behind-the-scenes history of the winery. That extra touch made the visit really special for us.

And of course, we still left with six bottles, so it’s safe to say the wine spoke for itself.

Would we return? Probably not, simply because we now know that we prefer the smaller, more personal winery experiences. But for anyone looking to check off a historic bucket-list winery, Chateau Montelena is a must-see and I am glad we did it.
Dinner: Dry Creek Kitchen – Fancy, but Maybe Too Fancy

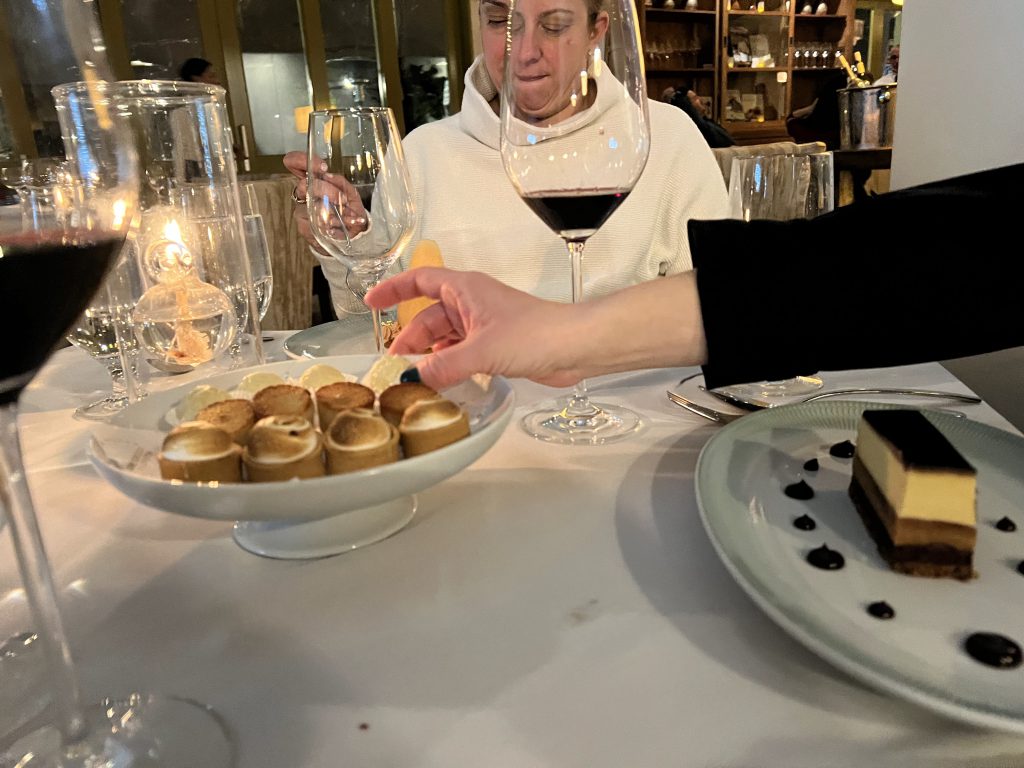
After a long day of tasting and eating, we were running on fumes. But we had a reservation at Charlie Palmer’s Dry Creek Kitchen, one of Healdsburg’s finer dining spots. White tablecloths, top-tier service, serious wine list. As a matter of fact we were so tired we were woken up by Matt and Lindsey at 7:30, and our reservations where for 7:30… So we went into hyperdrive and got there at 7:45 and they were happy to honor our reservation still.

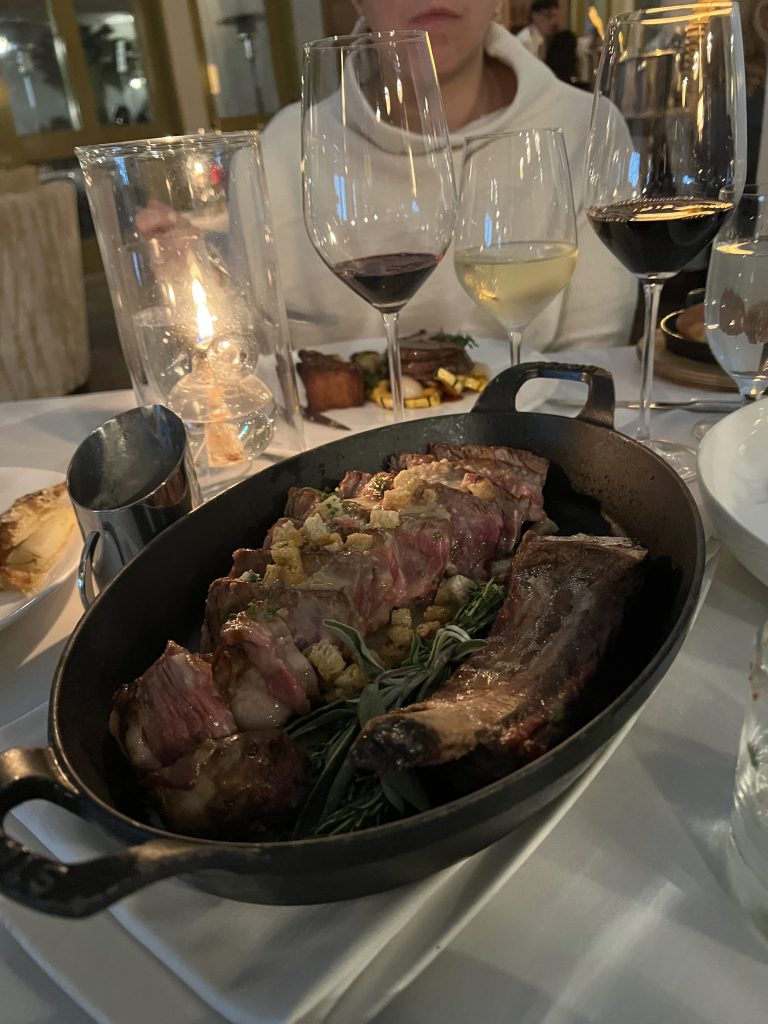
Lindsey loved her halibut. Matt and I split a 32-ounce, 28-day dry-aged ribeye. It was good but not mind-blowing. The tableside beef tartar was exceptional however. Maybe we were just too full from the day’s indulgences, but we realized we actually preferred the more laid-back, small-plates approach.

Would I go back? Probably not, but not for any negative reason—just personal preference at that time.
Final Thoughts on Day 2

  • Silver Steve is the man. If you’re going to Napa, hire him.
  • Fisher Vineyards was the GOAT—don’t miss it.
  • Schramsberg’s caves were straight-up magical.
  • Chateau Montelena? Cool history.
  • Dry Creek Kitchen? Fancy, well-executed, but we were too stuffed to truly enjoy it.

After 12 hours of wine, food, and exploring, we were toast. Back to the Hilton Lodge for some much-needed sleep before another big day.


Day 3: A Spa Reset and an Unexpected Dinner Hit

After two full days of wine tasting, eating, and exploring, we needed a break. A day to reset, recover, and recharge before diving back into more tastings.

Enter Solage Spa.

A Morning at Solage Spa – Ultimate Recovery Mode

We booked massages for all and the girls booked facials at Solage, Auberge Resorts Collection—one of the premier spa destinations in Napa Valley. There were two major spa options in the area, and while Solage was expensive ($1,100 for just Sarah and me), the other one was even more. So, Solage it was.

The best part? Booking a spa service gives you full-day access to their spa facilities, and they are pretty great. So, we made sure to take advantage.

But first, breakfast.

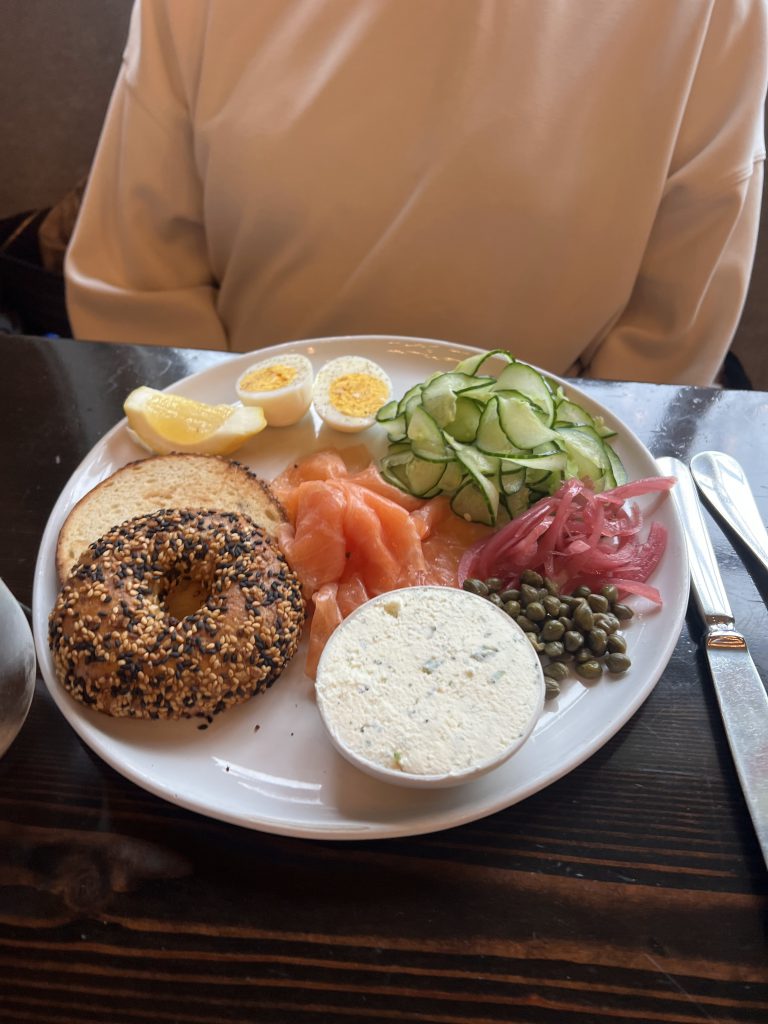
We arrived two hours early and grabbed breakfast at Solbar, their on-site restaurant. As expected, the menu was very California—think avocado toast, Dungeness crab benedict, smoothies, and blood orange mimosas. Everything was good, but also very overpriced, but such is life in California. Let’s just say we weren’t blown away, but we weren’t mad about it either. It’s possible there was some hangovers in our presence.

After breakfast, it was spa time.

  • Two massive 104°F hot tubs – One saltwater, one mineral
  • A magnesium soak – Sounds fancy, but in reality, it was cold (ambient temperature, aka took some getting used to in the rain)
  • Sauna & steam room – A nice warm-up before the main event
  • A sub-50-degree cold plunge – Because why not?

Now, let’s talk about the cold plunge.

I did it twice. The second time, I held for two minutes. It was brutal, but also kind of awesome. There’s a moment when you have to mentally disconnect from reality to fight the urge to jump out. And as much as it sucked in the moment, I felt absolutely incredible afterward.

Then came the massages.

My therapist asked if the pressure was okay, and I said yes. That was a mistake, but that’s on me, make sure to communicate and not be a tough guy. I was sore for hours afterward. But hey, no pain, no gain. Everyone else thoroughly enjoyed theirs.

While the girls got their facials, Matt and I spent an hour in the hot tubs, drinking French 75s and soaking in the cold rain. It was exactly what we needed after 48 hours of heavy drinking and eating.

An Afternoon Nap & A Laid-Back Snack in Healdsburg at the hotel

After the spa, we headed back to the hotel for some much-needed rest. We had a snack of our Boudin sourdough from San Francisco, plus some cheese and charcuterie we had picked up from a local market earlier in the trip. Then, we crashed for a nap before dinner.

Dinner at Barndiva – Eclectic, Artsy, and Worth the Visit

For dinner, we chose Barndiva, a spot known for being as much an art gallery as it is a restaurant.

The vibe? Very eclectic.

  • Coat racks were made from old cobbler shoe molds
  • Walls were covered in hand-drawn art
  • It felt like a funky Parisian bistro mixed with a speakeasy

But the real highlight? The drinks.

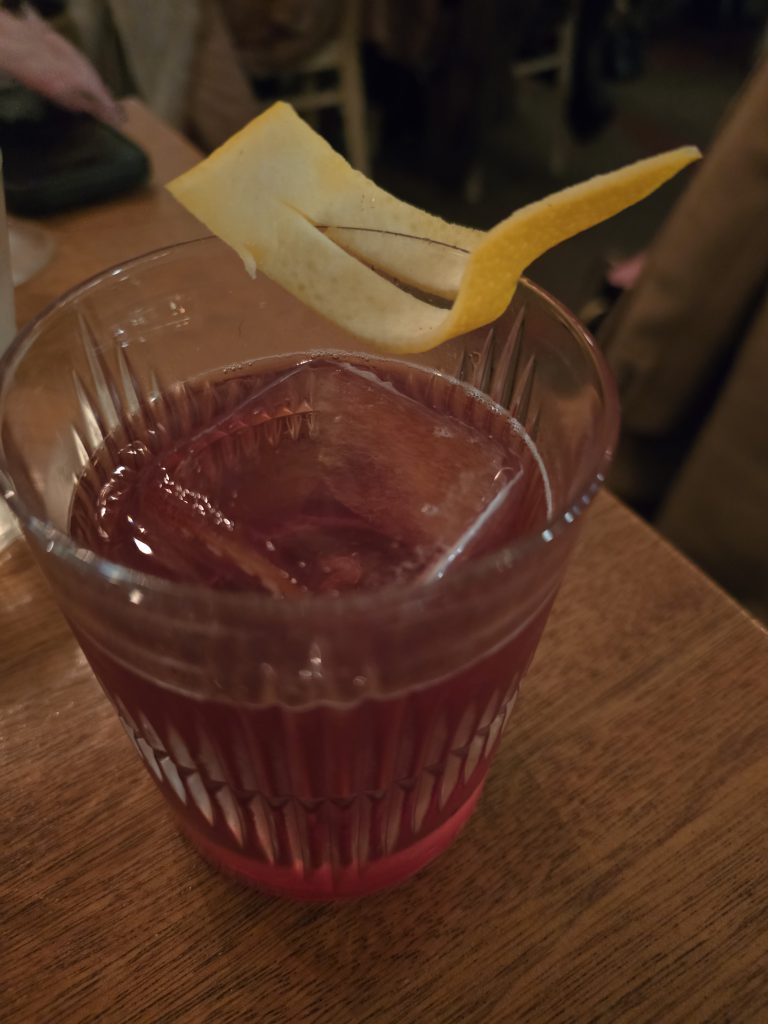
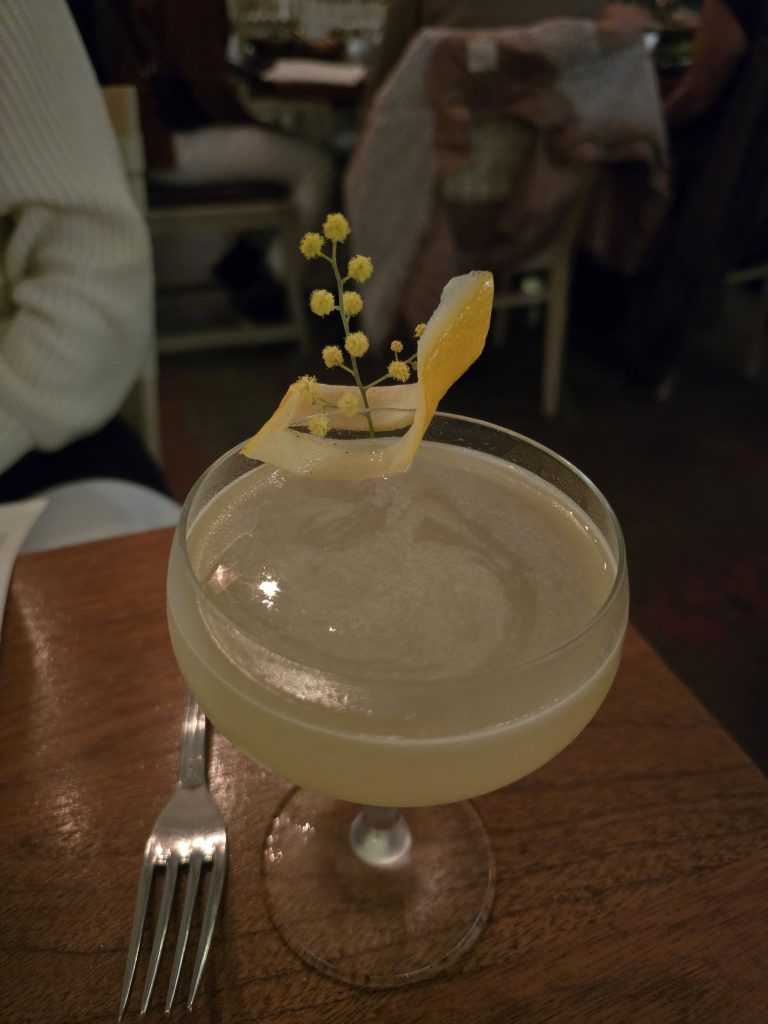
Their bar setup looked straight out of a Prohibition-era speakeasy, with dim lighting, walls of illuminated bottles, and bartenders in aprons making some of the best cocktails we had on the trip.

Food-wise, the menu was all over the place—in a good way.

  • Matt had Tikka Masala (Indian-inspired)
  • Lindsey had a Jucy Lucy burger (Minnesota-style stuffed burger)
  • Sarah had a Mediterranean-style crispy chicken with chimichurri
  • I had sunchoke soup to start, followed by handmade clam pasta
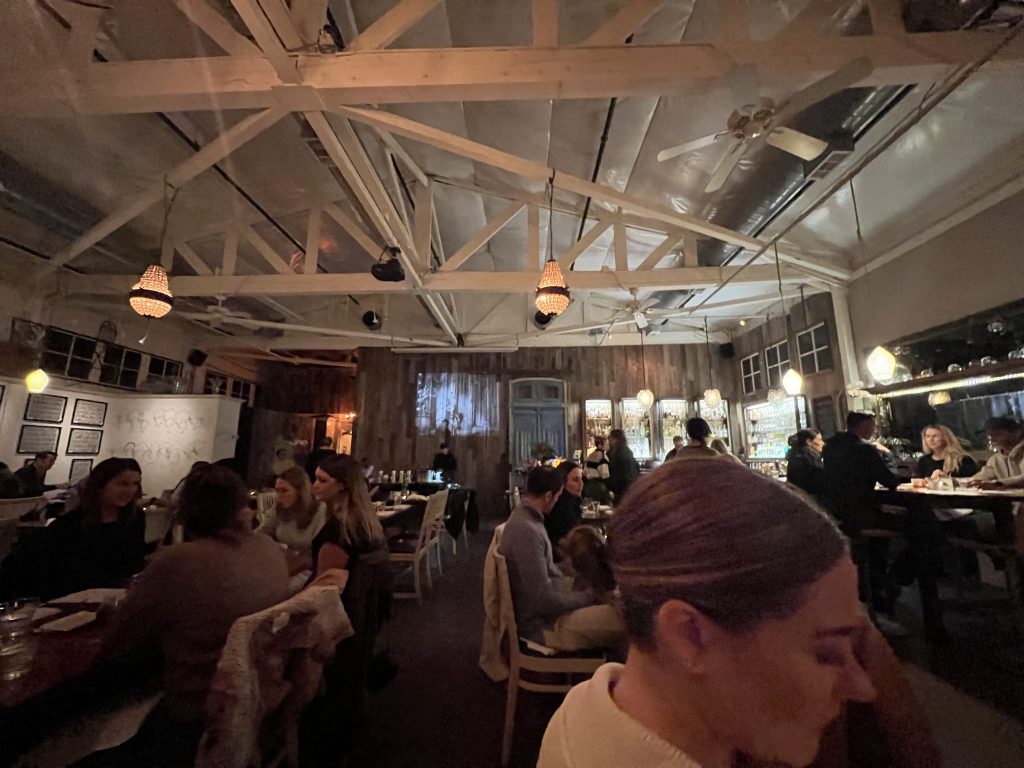
Everything was good. It was a little bit of everything but somehow worked.

  • Drinks? Outstanding.
  • Food? Solid.
  • Would we go back? Absolutely. 8/10.

Final Thoughts on Day 3

This was the reset day we needed after two full days of wine tasting.

  • Solage Spa was expensive but worth it. The hot tubs, cold plunge, and sauna were a game-changer.
  • The cold plunge was absolutely brutal—but also kind of amazing.
  • Barndiva was a cool, unique dining experience. Definitely worth checking out.


Day 4: One Last Round of Wine & the Perfect Final Stop

“The best trips aren’t just about the places you go, but the stories you bring back—and we left Napa with plenty of both.”Me, feeling whimsical

Morning Coffee – Black Oak Coffee Roasters, Healdsburg

For our final morning in Healdsburg, we grabbed coffee and breakfast at Black Oak Coffee Roasters, a local favorite known for its small-batch roasting and award-winning beans.

The coffee was fantastic, but the food was just as impressive. We had:

  • Breakfast burritos – Hearty, well-balanced, and exactly what we needed before another day of wine.
  • Chia seed overnight oats with strudel – A perfect mix of healthy and indulgent. Obviously, the girls chose this…

It was a great way to start our last day before heading out for more tastings.

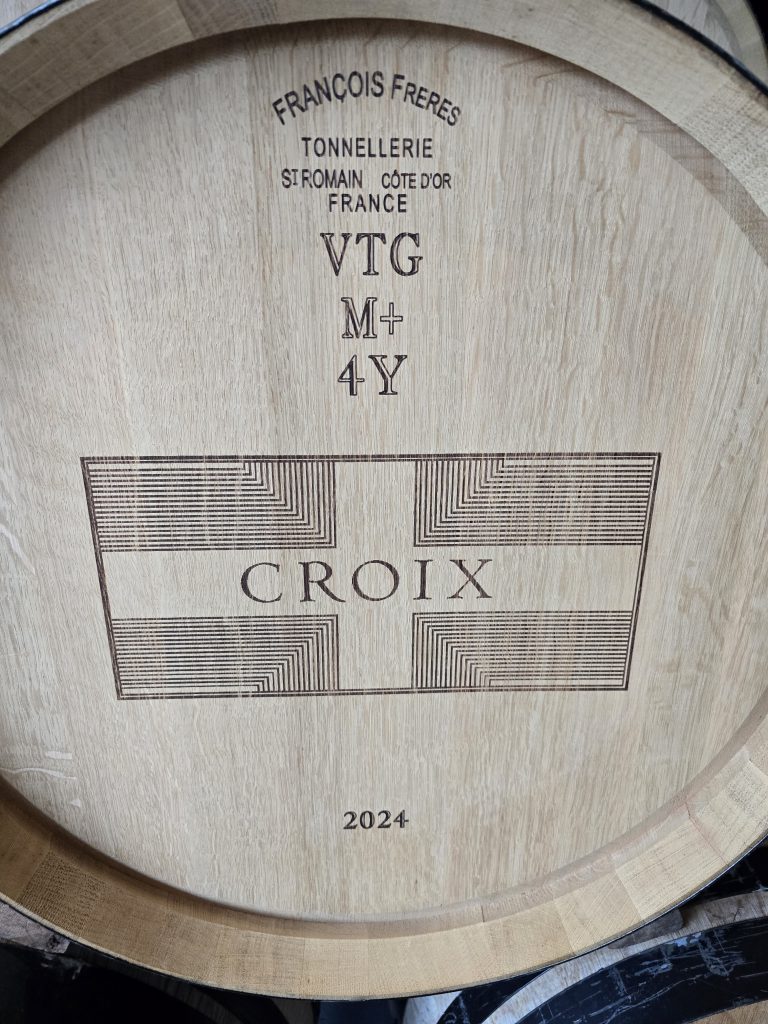
Stop #1: Croix Estate – A Cozy Fireside Tasting

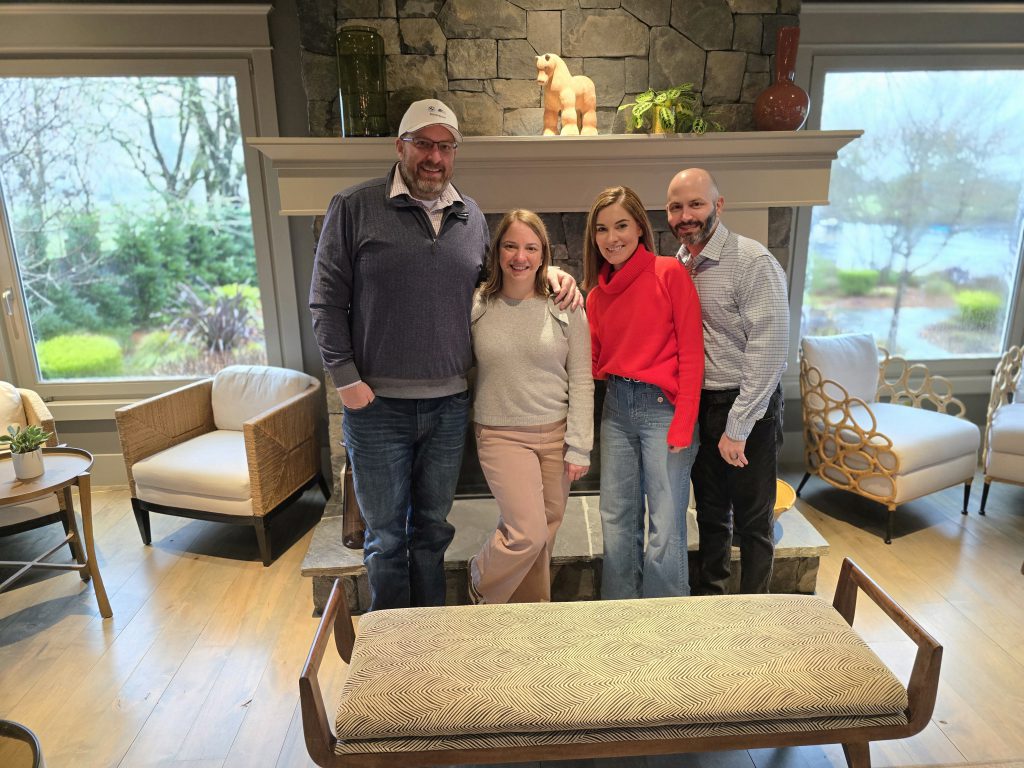
Our first stop was Croix Estate, a small-production, high-end winery specializing in Chardonnay and Pinot Noir. This was another home run for the “small, boutique winery” category.

We stepped off the van and were immediately greeted with a glass of Chardonnay—a smooth, crisp start to the day.

But the best part? The setting.

Instead of a traditional tasting room, we were led inside their estate home, where we had a private tasting by the fireplace. The whole experience was incredibly relaxed and intimate.

  • The wine? Fantastic.
  • The host? Amazing.
  • Lindsey joined the wine club, so you know it was good.

A perfect way to start the day.
Stop #2: Lunch at Diavola – Pizza & a Thank You to Steve

For lunch, we went to Diavola Pizzeria & Salumeria, a wood-fired pizza spot in Geyserville. It was exactly what we needed—casual, delicious, and satisfying.

Since Steve had been such a legend throughout our trip (and his pricing is flat-rate with gratuity included), we invited him to eat with us. It was a small way to say thanks for everything, and he really appreciated it, and we really enjoyed his company.

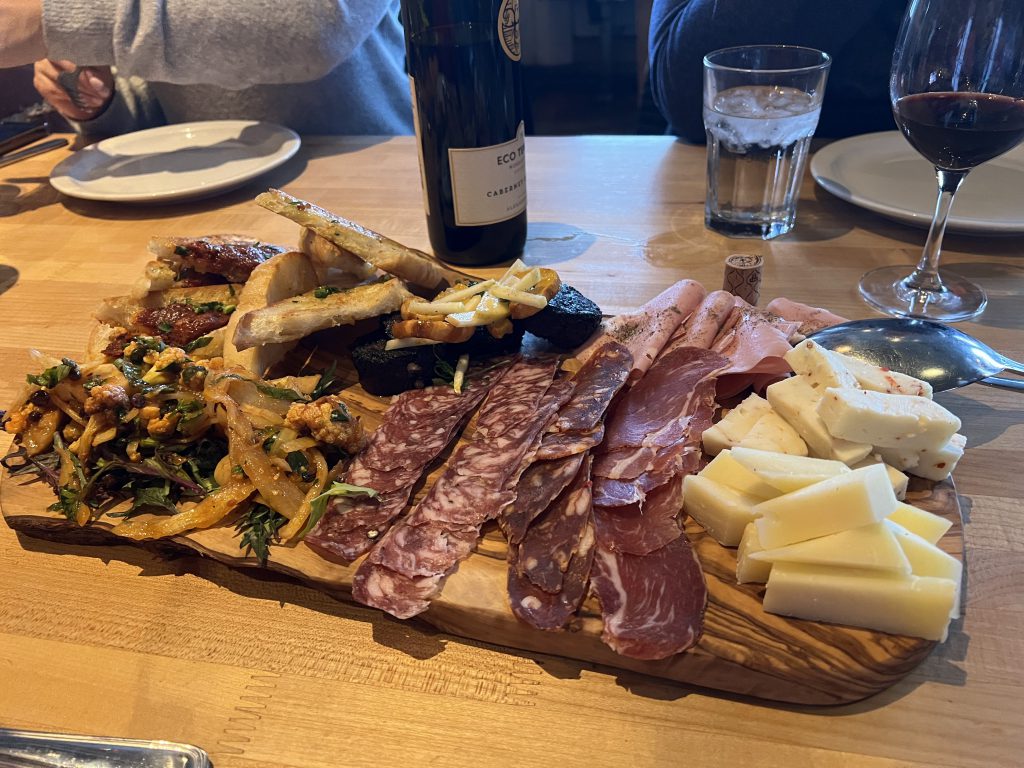
  • We had a charcuterie board with blood sausage
  • Tried three different pizzas
  • Everything was excellent

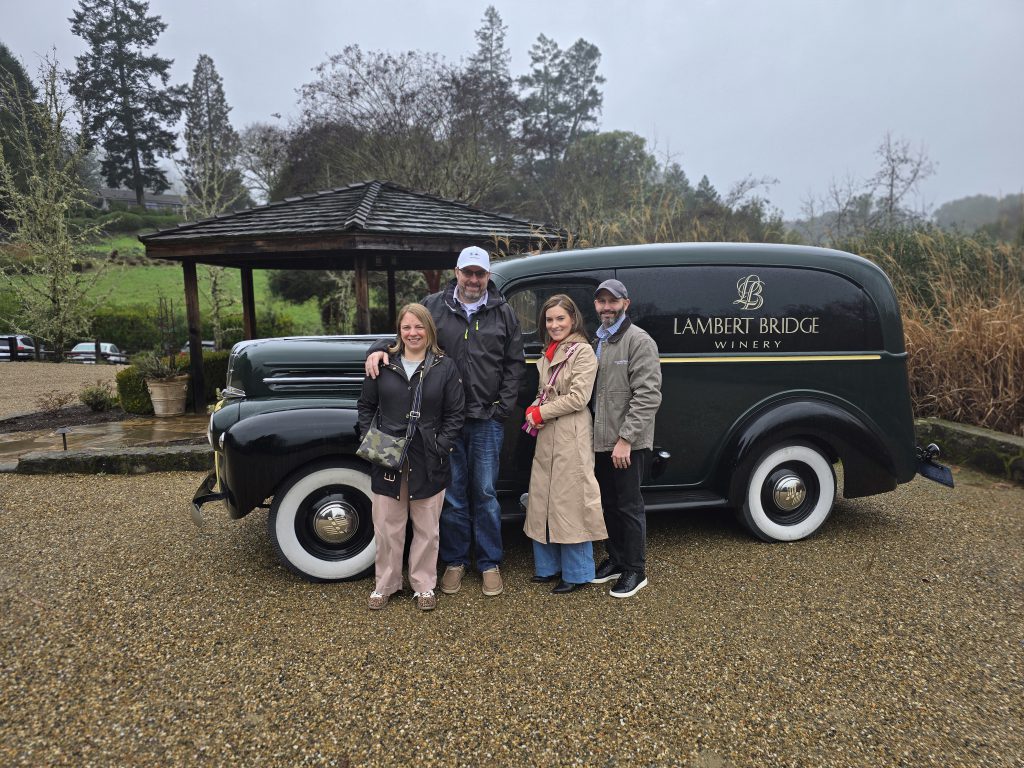
Stop #3: Lambert Bridge – A Beautiful, But Mixed Experience

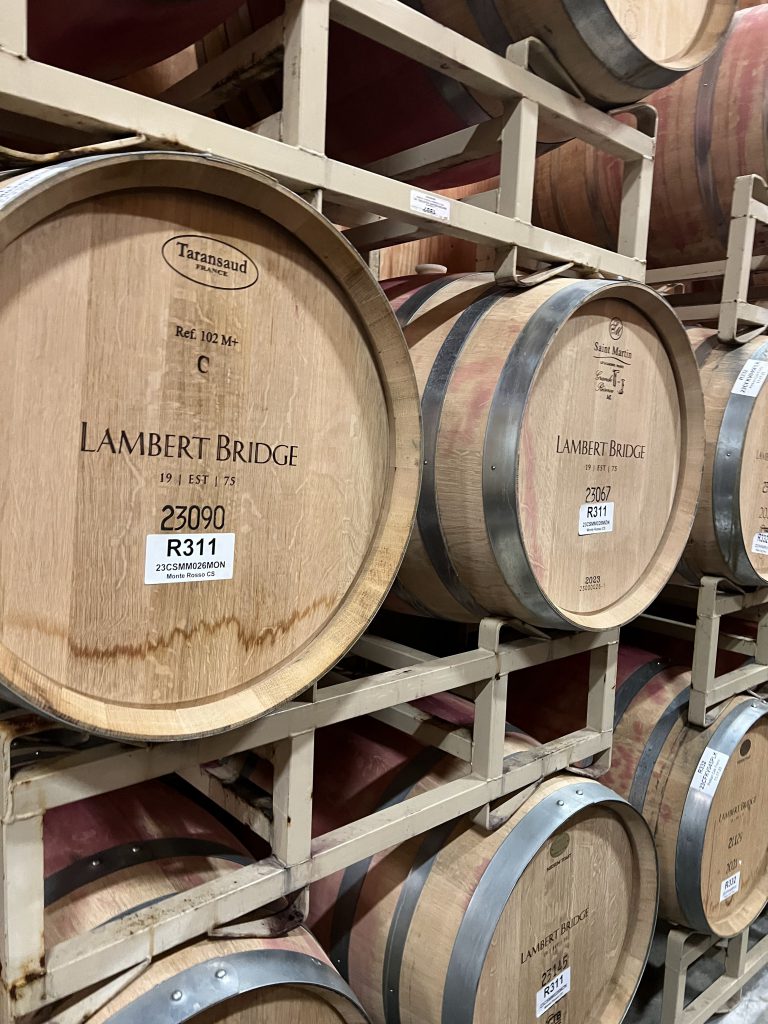
Steve had high expectations for Lambert Bridge, thinking it would be a perfect fit for us, and home of his personal favorite wine in the valley (which we sadly were not able to try). And while it had a lot going for it, it didn’t completely hit for us.

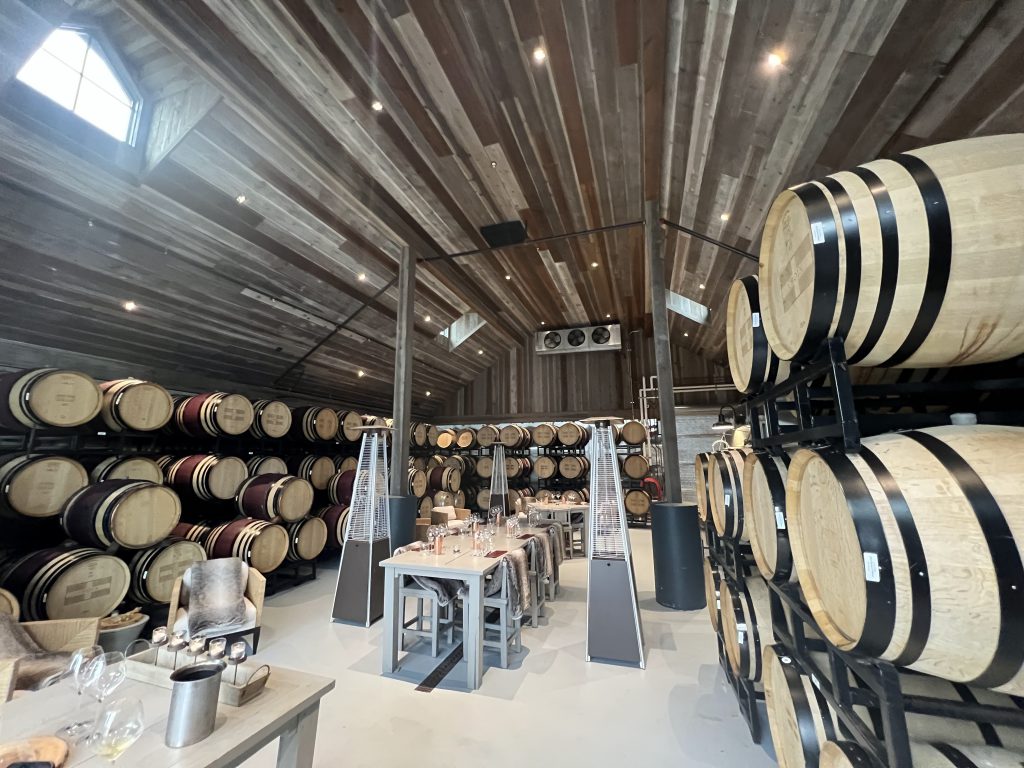
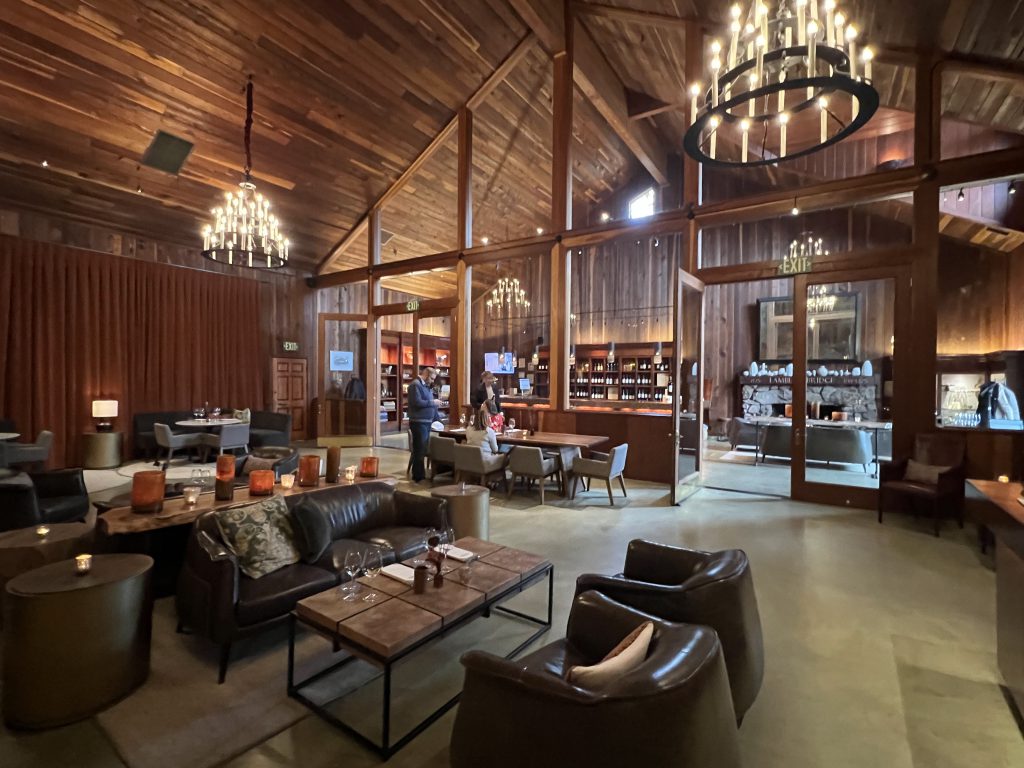
First, the setting was beautiful—a rustic, cozy winery surrounded by towering trees, with a barrel-lined tasting room and gorgeous chandeliers.

But compared to our other tastings, it felt a little less personal. There were other groups tasting at the same time, which made it a bit distracting compared to the private, intimate experiences we had been enjoying.

That said, it was far from a bad experience, and we still found some wines we really liked:

  • Sauvignon Blanc
  • Cuvee Blanc
  • Cabernet Sauvignon

We ended up joining the club, but more as a strategic move—they waived the substantial tasting fee if we did, so we figured we’d stock up for a year and then move on.

Would we return? Probably not, but it was still a nice stop.
Stop #4: Robert Young Estate – The Perfect Final Stop

Steve couldn’t have picked a better place to end the trip.

Robert Young Estate is another small, family-run winery, and it ended up being one of our absolute favorites—second only to Fisher.

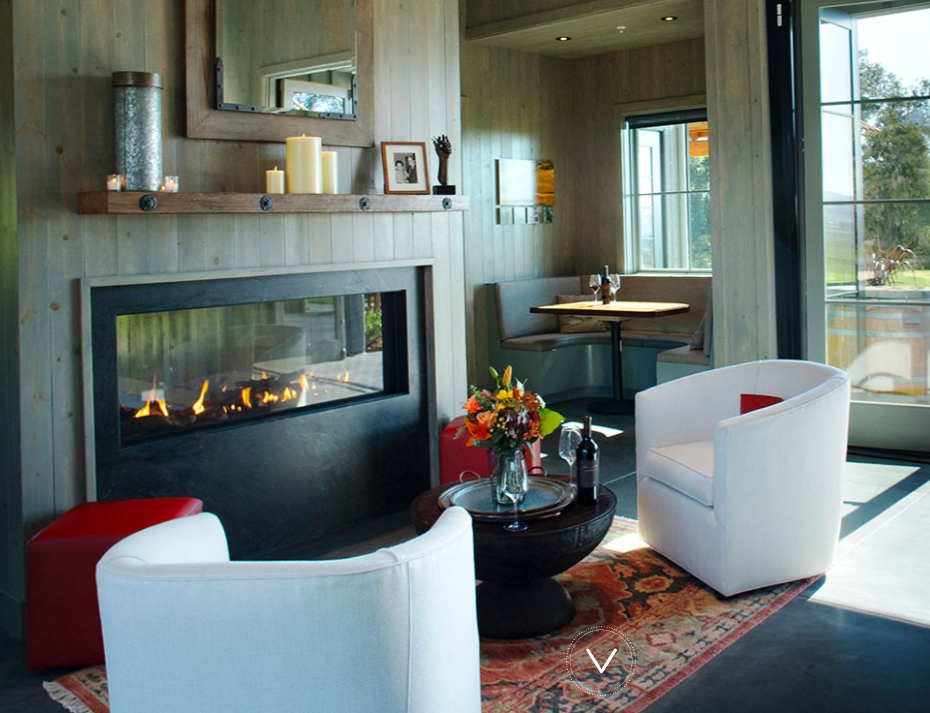
We had a private tasting by their fireplace (which, fun fact, is exactly the one featured on their website). The wines were incredible—so much so that, yes, we joined another wine club.

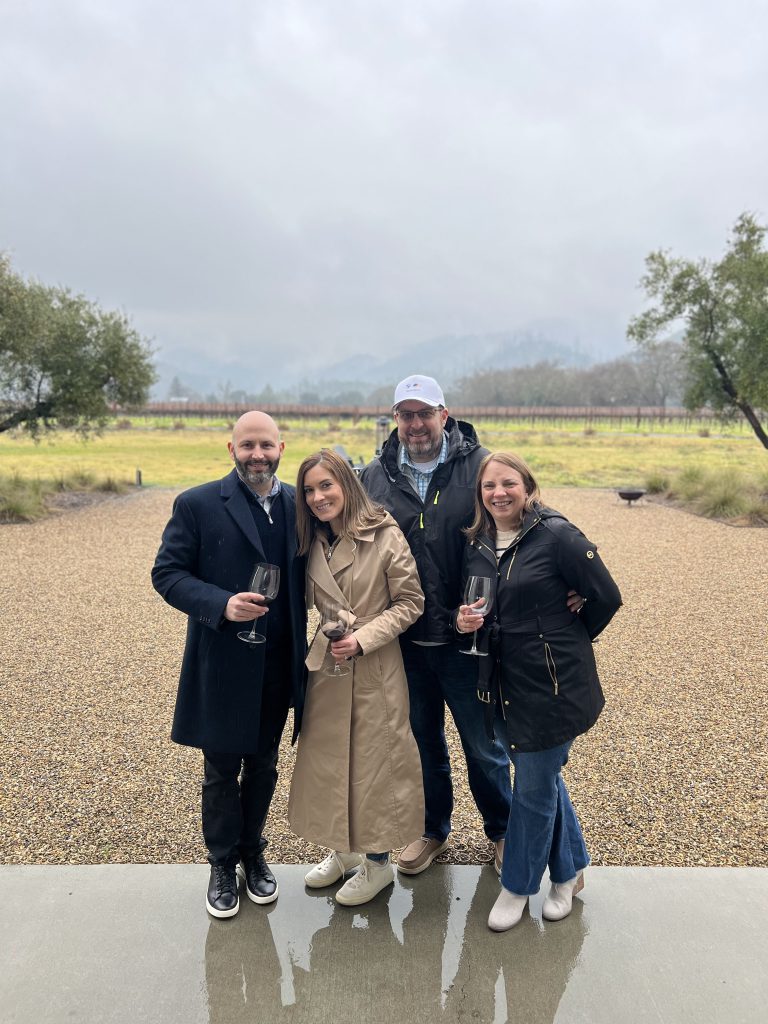
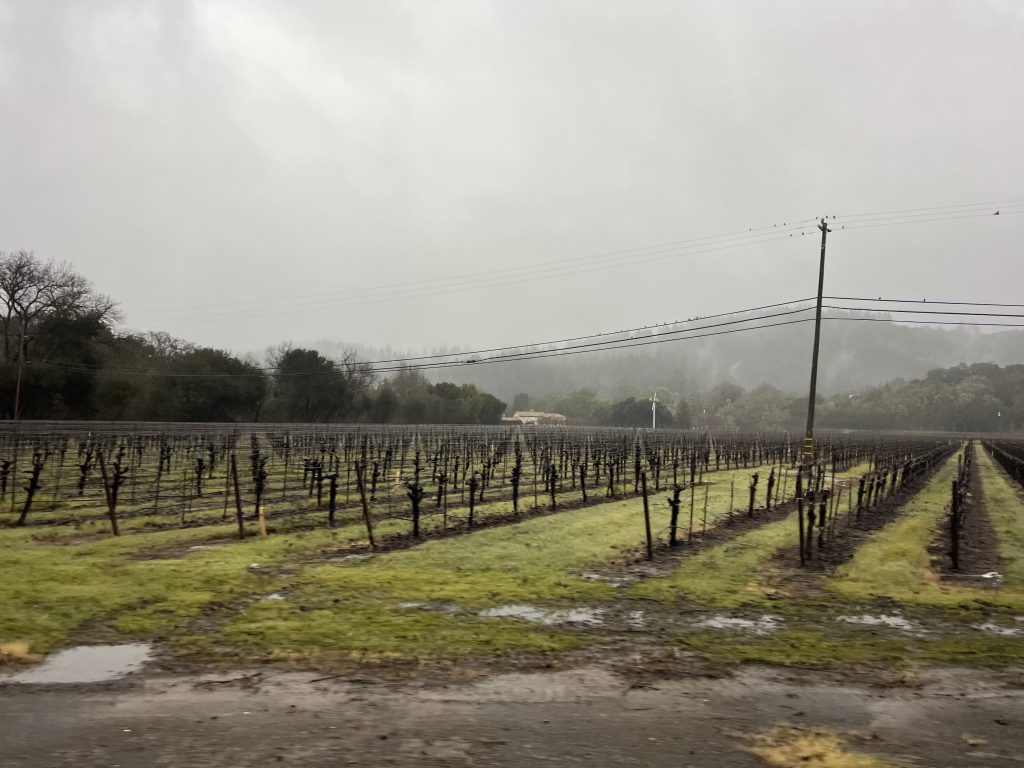
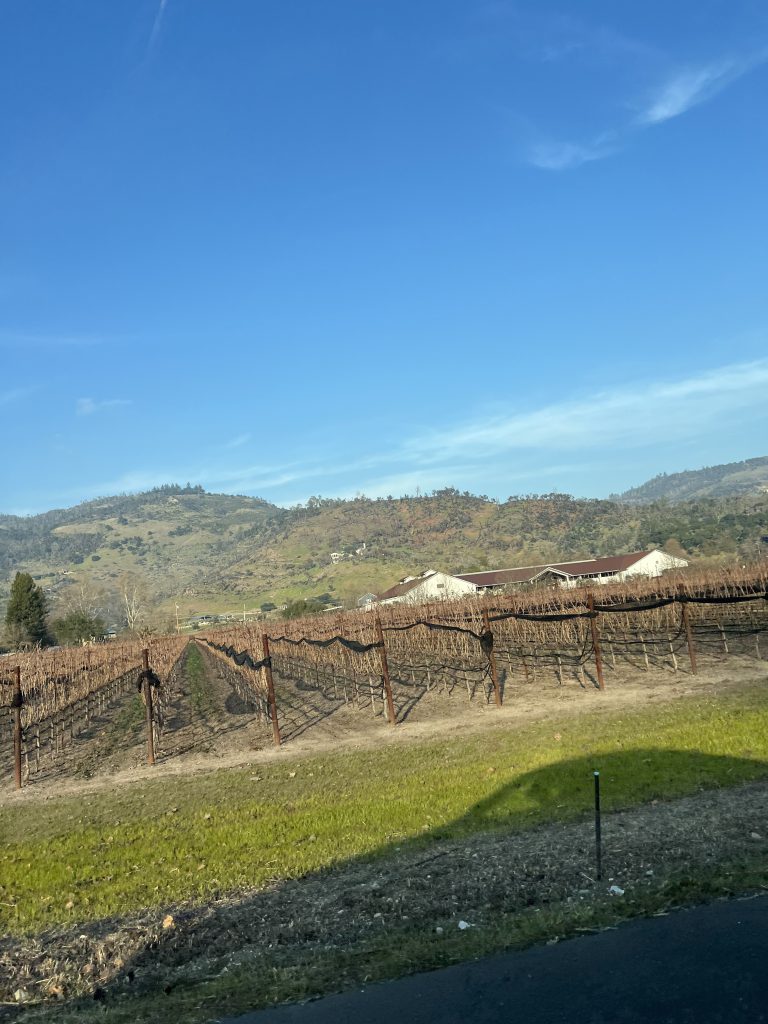
Even with the winter fog and barren vines, the view was stunning, and I can only imagine how breathtaking it must be in peak season.

Would I go back? Without question.

Final Dinner Plans? Changed.

We had originally planned to have our final dinner at Valette, one of Healdsburg’s most highly-rated restaurants.

But after four days of tastings, big meals, and nonstop activities, we made the right call to just stay in:

  • Ordered pizza in
  • Ate our leftover snacks from the market
  • Fully embraced a chill night before heading home

It was exactly what we needed.

Final Thoughts on Day 4 & The Trip Overall

After four days in Napa & Healdsburg, we learned a few things:

  • Silver Steve is the GOAT. If you’re visiting wine country, hire him.
  • We love small, family-run wineries. Fisher, Robert Young, Croix, and Schramsberg were the highlights.
  • We prefer intimate tastings over large, commercial setups.
  • Lambert Bridge and Chateau Montelena weren’t bad, just not quite our style.
  • Healdsburg is the perfect place to stay and eat.

Would we do it again? Absolutely. In fact, Steve already has curated in his mind after getting to know us six more wineries in mind for our next visit.

Until next time, Napa. 🍷
Leave a Comment

Super Rig Part Deux – Enter Aries

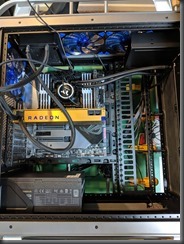
It was time.  The computer from my last super rig in 2009 needed an upgrade.  That thing has been literally powered on for 9 years, and, as a matter of fact, it is still on (just not my primary dev machine anymore)…  But, it no longer could handle the rigors of my natively compiled UWP development and media work I have been doing (well, at least not to the level of my patience).  Since I had such good luck with it over the years, I decided to build my next rig this year, and its a doozy.  I decided to go all out on this one.  This post will highlight the specs.

Intel – Core i9-7980XE 2.6GHz 18-Core Processor (https://siliconlottery.com/collections/all/products/7980xe43g)

I got it from Silicon Lottery (https://siliconlottery.com/).  I was planning on over clocking it (2.6Ghz isn’t all that great for single threaded performance), and for a few hundred extra bucks they de-lid it and guarantee it up to a certain amount of clock speed if you follow their specs.  I got the one that was good up to 4.3Ghz.  I am thoroughly convinced that my last rig has lasted so long because I took great care in keeping everything cool temperature wise, so de-lidding the processor was interesting to me, but not something I wanted to try myself with a two thousand dollar chip, so I left it up to them, and I think it was worth it. A lot of my specs after choosing this chip come from Silicon Lottery’s QVL.

Asus – ROG RAMPAGE VI EXTREME EATX LGA2066 Motherboard (https://www.asus.com/us/Motherboards/ROG-RAMPAGE-VI-EXTREME/)

This MOBO is beast mode.  You don’t have a lot of choices when you get into the X299 socket in the first place.  And to further limit this list, the Silicon Lottery QVL only allows this one plus 3 other possibilities.   This is the most feature robust one in the list in my opinion, but it’s pricey…

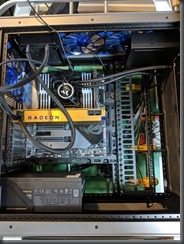
MVIMG_20171203_103031  MVIMG_20171203_103026 

G.Skill – Trident Z RGB 128GB (8 x 16GB) DDR4-2400 Memory (https://www.newegg.com/Product/Product.aspx?Item=N82E16820232553)

So why did I name it ARIES?  Well, it is my birth sign for one.  But more importantly, the mascot for Aries is…..RAM!!!  That’s not a typo, 128 GB RAM.  I’m not actually one for all the LED lighting and stuff, but since I got a clear case (more on that below), I figured I would get a blue motif going, and the memory can match, hence the RGB version.  If you didn’t want the RGB, the Ripjaws are identical with a heat sink.  I’m not sure I would ever buy any other brand of memory (fingers crossed).  I have had G. Skill in all of my builds and it has been literally flawless.

Aries-w  IMG_20171203_110440

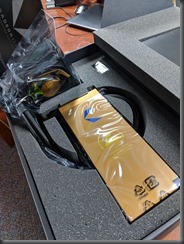
AMD – Vega Frontier Edition Liquid 16GB Frontier Edition Liquid Video Card (https://pro.radeon.com/en/product/radeon-vega-frontier-edition/)

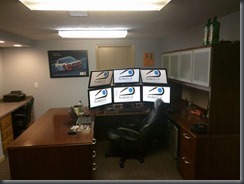
This build isn’t a gaming PC, so I didn’t get a gaming video card.  It is for work.  However, this card is unique in that it can run Professional, non-consumer, workstation drivers to develop, and can switch on the fly to gaming drivers to test what you developed, so it’s kind of a hybrid.  It also has 16GB VRAM which is HMB2 instead of DDR, which is important for me to drive my 6 monitors.  Everyone has an opinion on video cards, I’m not trying to start a debate.  This one makes me pretty happy currently.  It does have some pretty sweet looking blue LEDs on a gold frame as well.  It’s also liquid cooled, and has a 120mm radiator.  It supports up to 4 monitors natively, so I’m using a Club3d MST hub to get to 6.

MVIMG_20171124_222504   MVIMG_20171203_110426  8e99ecb8-cfaa-4b0c-ac66-29718a53c934-large (6 Acer 1920×1080, bottom row are touch screens)

Samsung – 960 EVO 1TB M.2-2280 Solid State Drive x 3 (https://www.samsung.com/us/computing/memory-storage/solid-state-drives/ssd-960-evo-m-2-1tb-mz-v6e1t0bw/)

A friend told me once that the feeling I got when I moved from HDD to SSD is ten fold going from SSD to M.2.  I’m not sure if it’s quite that much, but these are fast, and they aren’t even the PRO’s.  My MOBO holds 3 of them, so I got 3 TB’s worth.  All of my hard drives in my last PC were Samsung, and not one of them has failed in 9 years, so I stuck with them.

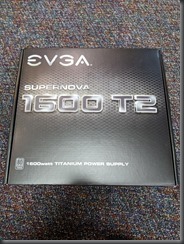
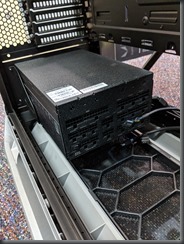
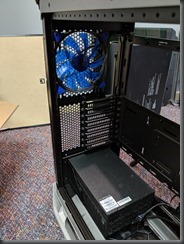
EVGA – SuperNOVA T2 1600W 80+ Titanium Certified Fully-Modular ATX Power Supply (https://www.evga.com/products/product.aspx?pn=220-T2-1600-X1)

Another one of the reasons that I think my last rig lasted for so long was because I gave it a lot of headroom.  No single component was being taxed to it’s limit.  That Frontier Vega card can be an energy hog taking upwards of 350 watts, and so can the 18 core/36 thread overclocked chip.  So I had to go with the biggest power supply I could find.  Its fully modular, which I really like.  Since I didn’t run any SATA drives or anything, I am only using the video card power supply and the 12V rail, and being modular meant I didn’t have as many cables to hide.

MVIMG_20171129_154734  MVIMG_20171129_154754  MVIMG_20171129_154750  MVIMG_20171129_154804

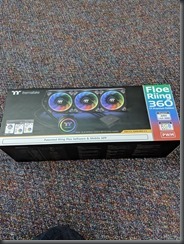
Thermaltake – Floe Riing RGB 360 TT Premium Edition 42.3 CFM Liquid CPU Cooler (http://www.thermaltake.com/products-model.aspx?id=C_00003122)

Going along with the “keep everything overly cool” theme, as well as the Silicon Lottery QVL calling for a 360mm radiator, this one was my choice.  It was easy to install, looks really cool, and I even have the RGB’s giving me a visual indicator of the temperature of the CPU.  As in, when it’s cool the lights are blue, and when it gets hotter it goes from green, yellow, and red (DANGER)! My CPU at idle is running about 28-29 degrees Celsius, and considering the 7980XE is supposed to be hot, I’m thrilled with that.  Under Prime95 stress testing it doesn’t get hotter than 69 degrees after prolonged stress, and bitcoin mining with all 18 cores with MinerGate it hovers around 55-60 degrees.  I used Thermaltake MX4 thermal paste per the QVL.

MVIMG_20171129_155011  IMG_20171204_095205   MVIMG_20171204_095201 

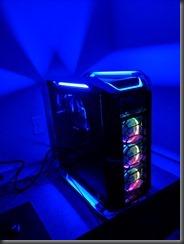
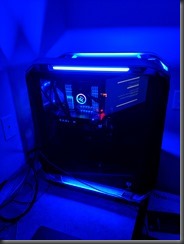
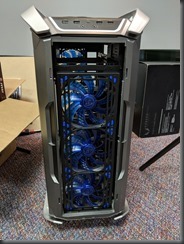
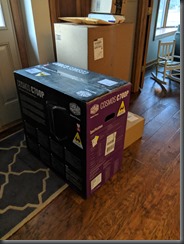
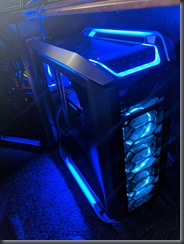
Cooler Master – COSMOS C700P ATX Full Tower Case (http://www.coolermaster.com/case/full-tower/cosmos-c700p/)

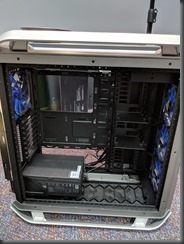
With the size of my components, I wanted a BIG case and believe me when I say it: this thing is HUGE.  Having all the room helps with cooling, a lot of the parts are huge and would be cumbersome to fit into something smaller, and I have a lot of room on my desk to support a large case.  The reviews on the case are, shall we say, mixed….But I have found it to be an extraordinary case.  It looks really sharp, has a tempered glass door to show off your LEDs, the iconic COSMOS handles (although my final build weighs over 75 pounds, so I’m not taking it anywhere), and so far seems to be really well built.

MVIMG_20171129_154740  IMG_20171128_163300

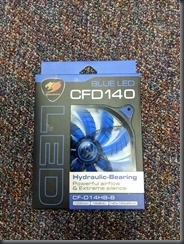
Cougar – Dual-X 73.2 CFM 140mm Fan (https://www.amazon.com/Cougar-CFD14HBG-140mm-Cooling-Green/dp/B00C42TJ54)

As a personal rule, I always replace the stock fans with aftermarket ones that push more CFM.  I also try to fill up every slot I can with an aftermarket fan.  My old PC was LOUD from all the fans, it sounded like a helicopter taking off in office constantly.  This one has more fans, and it is whisper quiet.  Like, it’s almost weird it’s so quiet.  You can occasionally hear the burble of the water block because it makes literally zero noise.  These are blue LED (per my motif), and a hydraulic bearing, and I am quite pleased with them so far.  I have my 360mm radiator blowing in, one of these on the bottom of the case blowing cold air in from the floor, one of these as an exhaust fan in the back, and 2 of these on the top as exhaust fans.  I have the liquid cooled video card radiator blowing in.  So, by some crude calculations, I have a slightly balanced pressure in my case.

MVIMG_20171129_155005

Overclocking

Currently I am overclocked about 71%, running all 18 cores at 4.0Ghz.  The QVL and warranty allow me to go up to 4.3, but I wanted a little headroom.  And it is quite stable.  I have few and far between lockups, and I am currently blaming the relatively new drivers for the video card, they appear to be the culprit anyway. 

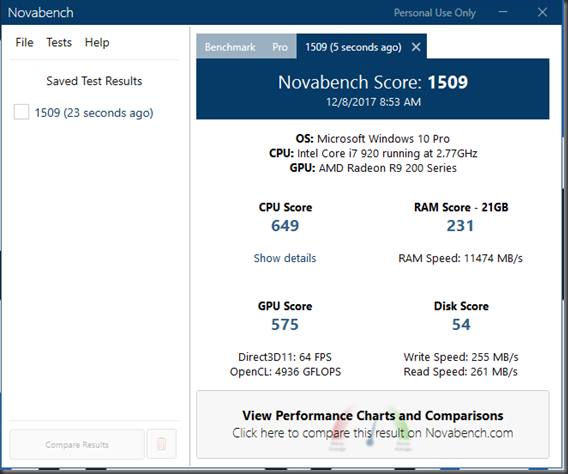
My old Novabench score:

694a22ee-6422-4120-b3aa-f245df719760

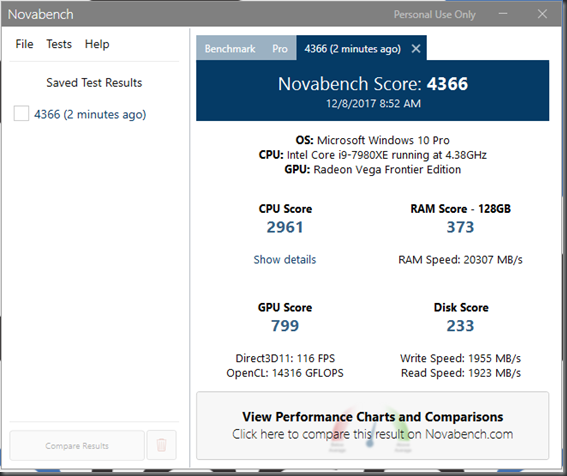
And my new Novabench score (picture is from a 4.3 Ghz overclock that my CPU is rated for, taking it to 4.0 barely affected the score really):

0708af08-5559-4b28-a4d5-bb5f31910b88

The improvement is INSANE.  Considering my old PC was still a pretty good computer, Aries blows it away, and I can tell from daily use.  Visual Studio loads up in a blink of an eye, and compiling our native UWP application went from 30 minutes, to about 4.

Total cost of the build was ~$8500 (not counting the monitors or audio stuff noted below).  Full part list here: (https://pcpartpicker.com/user/lkrammes/saved/#view=vPVm8d)

I work for a collaboration company currently where we work a lot in the media space (http://collaborationsolutions.com/products/shared-media-player/), and we are scattered all over the world, so we spend a lot of time on Microsoft Teams video chatting.  I wanted the freedom of being able to talk without a headset, so I have a fairly complex audio visual setup:

Creative Sound Blaster X7 (http://www.soundblaster.com/x7/) and sound setup

This is a full featured DAC, not just a sound card.  You literally could run your home theater setup with it.  I have it wired to 2 Bose studio monitors, and a 10 inch Polk Audio subwoofer (https://www.polkaudio.com/products/psw10).  The sound quality is simply amazing.  My audio engineer friend told me that it was the best sounding computer he has ever heard when we were tuning the EQ.  To give me the freedom to walk around my office and talk, I have an Audio-Technica PRO 44 Cardioid Condenser Boundary Microphone mounted above my top row of monitors (http://www.audio-technica.com/cms/wired_mics/8ba9f72f1fc02bc5/index.html).  It requires phantom power, and the X7 didn’t have enough juice to push it, so I had to add a phantom power supply (https://www.pyleaudio.com/sku/PS430/Compact-1-Channel-48V-Phantom-Power-Supply)

For the video, I went with the Logitech BRIO (https://www.logitech.com/en-us/product/brio) and man, this thing is sharp.  The video quality is amazing.  I get lots of comments on how clear I am in the video conference.

Das Keyboard 4 Professional (https://www.daskeyboard.com/daskeyboard-4-professional/) and Level 10 M Diamond Black Mouse (http://www.ttesports.com/Mice/39/LEVEL_10_M_Diamond_Black/productPage.htm?a=a&g=ftr#.WlV3w6inGUk)

I am a fan of the phrase “if you use something every day, buy the best one you can afford”.  Just like a mechanic would want Snap-On or Mac Tools, I wanted a good keyboard and mouse.  These are simply my favorites.  The keyboard has Cherry MX mechanical keys that I find a joy to type with, and having a volume control knob at my fingertips is one of my favorite features.  The mouse is a joint design effort from Thermaltake and BMW.  For those that know me, they know my obsession with BMW…(love this mouse).

ROG Rapture GT-AC5300 Router (https://www.asus.com/us/Networking/ROG-Rapture-GT-AC5300/)

This thing is a beast as well.  It’s super fast, and has a ton of range (I almost don’t need my access points in the house, of which I had 3 to get coverage everywhere).  I currently have it plugged in to 2 ASUS AC68U’s (https://www.asus.com/us/Networking/RTAC68U/) as AP’s, one on each floor, router in the basement, to get full coverage all over my house and yard.  Recently, ASUS announced that they are going to let the AC68U to be used as an AI Mesh node in conjuntion with the Rapture (https://www.asus.com/AiMesh/), which I will be experimenting with once the firmware gets out of beta.  My neighbors tell me that my WiFi signal is higher in their house than their own router…

So, that’s my new system.  So far I couldn’t be happier.  What do you think?

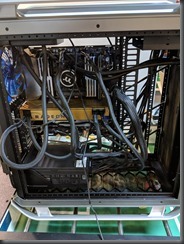
Pre cable cleanup:

MVIMG_20171203_125038

Post cable cleanup:

MVIMG_20171203_110426 

Ready to rock!

IMG_20171213_165929

1 Comment

Using Azure Media Services to get metadata from a media file

Azure Media Services is a great tool for encoding all types of media.  One of it’s major advantages is that it accepts a bunch of different input types (AMS supported file types).  So you can almost agnostically give it a video file, and get an mp4 as output (amongst a myriad of other things it can do).  However, with the current version, you cant get an information about a video file until AFTER it has been transcoded.

I wanted to get information about the input video file BEFORE it is transcoded….

Sure, there are packages that can do this (MediaInfo although you can’t get audio channel info, FFProbe, TaglibSharp, etc.), but most if not all require the file to be written to disk.  That is a problem if you are looking at a byte array from blob storage, or want to get that information from a stream uploaded from a web client without writing it to disk.

So I applied a little hack to use AMS to get the audio and video metadata from a video file, and I need it quickly, so I don’t want to encode the entire video.

First, you need a JSON preset to perform the simplest (see fastest) of AMS tasks, generate a single thumbnail.

{
   "Version":1.0,
   "Codecs":[
      {
         "Type":"PngImage",
         "PngLayers":[
            {
               "Type":"PngLayer",
               "Width":640,
               "Height":360
            }
         ],
         "Start":"{Best}"
      }
   ],
   "Outputs":[
      {
         "FileName":"{Basename}_{Index}{Extension}",
         "Format":{
            "Type":"PngFormat"
         }
      }
   ]
}

This will create a single thumbnail, and it will ask AMS to generate the “best” one, meaning it uses it’s brain to figure out the most relevant thumbnail, so you don’t get a blank one because the first few seconds of the video are black.

IJob metaDataJob = CreateJob(context, $"{inputAsset.Asset.Name}-Metadatajob");                    
IMediaProcessor processor = GetLatestMediaProcessorByName("Media Encoder Standard", inputAsset.GetMediaContext());

ITask task = job.Tasks.AddNew(taskName,
        processor,
        EncodingPreset.GetBaseThumnailOnlyEncodingPreset(), // this is the JSON from above,
        TaskOptions.None);
task.InputAssets.Add(inputAsset);

task.OutputAssets.AddNew($"Thumbnail_{inputAsset.Name}", AssetCreationOptions.None);

await metaDataJob.SubmitAsync();

// Check job execution and wait for job to finish.
  Task progressJobTask = job.GetExecutionProgressTask(CancellationToken.None);
 progressJobTask.Wait();

// Get a refreshed job reference after waiting on a thread.
metaDataJob = GetJob(metaDataJob.Id, context);

// Check for errors
if (metaDataJob.State == JobState.Error)
{                    
  return;
}

I have found that regardless of the video size or video length, this process takes an average of 40 seconds (if you have a media encoder unit available, and you should if you utilize this technique: Auto Scaling Media Reserved Units in AMS .  And, so that not all is lost, you likely will have a use for this thumbnail if you are doing this sort of thing in the first place.

Once the job is complete, you can see that the output for the job is a single thumbnail, and an _metadata.xml file

image

Now we must assign a Sas locator to it so we can download that xml file:

IAsset outputAsset = job.OutputMediaAssets[0];
ILocator outputLocator = outputAsset.Locators.Where(l => l.Type == LocatorType.Sas).FirstOrDefault() ??
outputAsset.GetOrCreateLocator(LocatorType.Sas, AccessPermissions.Read | AccessPermissions.List | AccessPermissions.Write, AssetManager.CalculateExpirationDate(message));               
IAssetFile outputAssetXmlFile = outputAsset.AssetFiles.Where(file => file.Name.EndsWith(".xml")).First(); //gets guid_metadata.xml
Uri xmlUri = outputAssetXmlFile.GetSasUri(outputLocator);

By the way, GetOrCreateLocator is an extension to help reuse locators since AMS limits you to only 5:

public static ILocator GetOrCreateLocator(this IAsset asset, LocatorType locatorType, AccessPermissions permissions, TimeSpan duration, DateTime? startTime = null, TimeSpan? expirationThreshold = null)
{
  MediaContextBase context = asset.GetMediaContext();

  ILocator assetLocator = context.Locators.Where(l => l.AssetId == asset.Id && l.Type == locatorType).OrderByDescending(l => l.ExpirationDateTime).ToList().Where(l => (l.AccessPolicy.Permissions & permissions) == permissions).FirstOrDefault();

  if (assetLocator == null)
  {
    // If there is no locator in the asset matching the type and permissions, then a new locator is created.
    assetLocator = context.Locators.Create(locatorType, asset, permissions, duration, startTime);
  }
  else if (assetLocator.ExpirationDateTime <= DateTime.UtcNow.Add(expirationThreshold ?? DefaultExpirationTimeThreshold))
  {
    // If there is a locator in the asset matching the type and permissions but it is expired (or near expiration), then the locator is updated.
    assetLocator.Update(startTime, DateTime.UtcNow.Add(duration));
  }

  return assetLocator;
}

Ok, so now we have an xml file containing the metadata, and it looks like this:

<?xml version="1.0"?>
<AssetFiles xmlns:xsd="http://www.w3.org/2001/XMLSchema" xmlns:xsi="http://www.w3.org/2001/XMLSchema-instance" xmlns="http://schemas.microsoft.com/windowsazure/mediaservices/2014/07/mediaencoder/inputmetadata">
  <AssetFile Name="Taylor_Swift_-_Blank_Space_mp4_ItemId(1040).mp4" Size="62935612" Duration="PT4M32.463S" NumberOfStreams="2" FormatNames="mov,mp4,m4a,3gp,3g2,mj2" FormatVerboseName="QuickTime / MOV" StartTime="PT0S" OverallBitRate="1847">
    <VideoTracks>
      <VideoTrack Id="1" Codec="h264" CodecLongName="H.264 / AVC / MPEG-4 AVC / MPEG-4 part 10" TimeBase="1/90000" NumberOfFrames="6531" StartTime="PT0S" Duration="PT4M32.355S" FourCC="avc1" Profile="High" Level="4.0" PixelFormat="yuv420p" Width="1920" Height="1080" DisplayAspectRatioNumerator="16" DisplayAspectRatioDenominator="9" SampleAspectRatioNumerator="1" SampleAspectRatioDenominator="1" FrameRate="23.980" Bitrate="1716" HasBFrames="1">
        <Disposition Default="1" Dub="0" Original="0" Comment="0" Lyrics="0" Karaoke="0" Forced="0" HearingImpaired="0" VisualImpaired="0" CleanEffects="0" AttachedPic="0"/>
        <Metadata key="language" value="und"/>
        <Metadata key="handler_name" value="VideoHandler"/>
      </VideoTrack>
    </VideoTracks>
    <AudioTracks>
      <AudioTrack Id="2" Codec="aac" CodecLongName="AAC (Advanced Audio Coding)" TimeBase="1/44100" NumberOfFrames="11734" StartTime="PT0S" Duration="PT4M32.463S" SampleFormat="fltp" ChannelLayout="stereo" Channels="2" SamplingRate="44100" Bitrate="125" BitsPerSample="0">
        <Disposition Default="1" Dub="0" Original="0" Comment="0" Lyrics="0" Karaoke="0" Forced="0" HearingImpaired="0" VisualImpaired="0" CleanEffects="0" AttachedPic="0"/>
        <Metadata key="language" value="und"/>
        <Metadata key="handler_name" value="SoundHandler"/>
      </AudioTrack>
    </AudioTracks>
    <Metadata key="major_brand" value="isom"/>
    <Metadata key="minor_version" value="512"/>
    <Metadata key="compatible_brands" value="isomiso2avc1mp41"/>
    <Metadata key="encoder" value="Lavf56.40.101"/>
  </AssetFile>
</AssetFiles>

That has the information I am looking for!  We can consume it now:

XDocument doc = XDocument.Load(xmlUri.ToString());

Dictionary<XName, string> videoAttributes = doc.Descendants().First(element => element.Name.LocalName == "VideoTrack").Attributes().ToDictionary(attribute => attribute.Name, attribute => attribute.Value);

int width = Convert.ToInt32(videoAttributes["Width"]);

int height = Convert.ToInt32(videoAttributes["Height"]);

int bitrate = Convert.ToInt32(videoAttributes["Bitrate"]);

Dictionary<XName, string> audioAttributes = doc.Descendants().First(element => element.Name.LocalName == "AudioTrack").Attributes().ToDictionary(attribute => attribute.Name, attribute => attribute.Value);

int channels = Convert.ToInt32(audioAttributes["Channels"]);

or pull anything else out of that file that you want.

In my post about creating a custom bitrate ladder (see Creating a custom bitrate ladder from AMS), we need that information BEFORE we transcode so we can set the ceiling of our bitrate ladder.

I spoke with David Bristol from Microsoft about this (his blog has a bunch of great AMS related information David Bristol’s Media blog), and he agrees that something like the output of Media Info or FFMPEG’s ffprobe.exe would be great to run on an uploaded asset and is suggesting it to the AMS team, so hopefully we will see this kind of functionality in the future.  40 seconds isn’t great, so I hope we can improve on that, but this might get you to the dance for now.

Leave a Comment

Creating a custom bitrate ladder from Azure Media Services Transcoding

When submitting a transcoding job to Azure Media Services with Media Encoder Standard, the documentation will tell you to use one of the provided presets like this:

string configuration = File.ReadAllText(@"c:\supportFiles\preset.json"); // Create a task

ITask task = job.Tasks.AddNew("Media Encoder Standard encoding task", processor, configuration, TaskOptions.None);

//https://docs.microsoft.com/en-us/azure/media-services/media-services-mes-presets-overview

or by Adaptive Streaming by adding a task like this:

ITask task = job.Tasks.AddNew("My encoding task", processor, "Adaptive Streaming", TaskOptions.None);

In the first example, you are creating multi-bitrate mp4s all the way up to 1080, or even 4k if that is the preset you selected.  In the latter example, what this is doing under the covers is great; You are telling AMS to create the bitrate ladder on the fly based on the input, and to let Microsoft work its magic.  But there are limitations to using Adaptive Streaming from C#, one being that you can’t add thumbnails in the same job, for example.

So what if you want a little more control?  I’ve created a fluent interface for creating your own presets and creating a bitrate ladder that doesn’t “up-encode” based on the quality of the original video.

First, we need to define an EncodingPreset class that will eventually be converted to JSON in valid MES preset format:

public class EncodingPreset
     {
         /// <inheritdoc />
         private EncodingPreset()
         {
             Codecs = new List<Codec>();
             Outputs = new List<Output>();
         }

        public double Version { get; set; }
         public List<Codec> Codecs { get; set; }
         public List<Output> Outputs { get; set; }

        public static EncodingPreset GetBaseEncodingPreset()
         {
             var preset = new EncodingPreset
                          {
                              Version = 1.0d
                          };

            preset.Codecs.Add(Codec.GetH264Codec());
             preset.Outputs.Add(Output.GetMp4Output());

            return preset;
         }

        public EncodingPreset AddNormalAudio()
         {
             Codec codec = Codecs.FirstOrDefault(c => c.Type == "AACAudio");
             if (codec == null)
             {
                 Codec audioCodec = Codec.GetNormalAudioCodec();

                Codecs.Add(audioCodec);
             }

            return this;
         }

        public EncodingPreset AddHDAudio()
         {
             Codec codec = Codecs.FirstOrDefault(c => c.Type == "AACAudio");
             if (codec == null)
             {
                 Codec audioCodec = Codec.GetHDAudioCodec();
                 Codecs.Add(audioCodec);
             }

            return this;
         }

        public EncodingPreset AddBitrateLadder(int width, int height, int bitrate)
         {
             IList<ResolutionInfo> orderedLadder = BitrateLadder.OrderedLadder; //lowest to highest resolution
             int originalPixels = width * height;
             var bitrateTolerance = .05;

            var layersToGenerate = new List<ResolutionInfo>
                                    {
                                        new ResolutionInfo // add the original
                                        {
                                            Width = width,
                                            Height = height,
                                            Bitrate = bitrate
                                        }
                                    };
             foreach (ResolutionInfo step in orderedLadder)
             {
                 if (step.Pixels <= originalPixels)
                 {
                     int min = Math.Min(step.Bitrate, bitrate);
                     layersToGenerate.Add(new ResolutionInfo
                                          {
                                              Width = step.Width,
                                              Height = step.Height,
                                              Bitrate = min
                                          });
                 }
             }

            // make the bitrates distinct - not sure i like this
             List<ResolutionInfo> orderedLayersToGenerate = layersToGenerate.OrderBy(info => info.Pixels).ThenBy(info => info.Bitrate).ToList();
             for (var i = 0; i < orderedLayersToGenerate.Count - 1; i++)
             {
                 foreach (ResolutionInfo layerToGenerate in orderedLayersToGenerate.Where(layerToGenerate => orderedLayersToGenerate.Any(info => info.Bitrate == layerToGenerate.Bitrate && info.Pixels != layerToGenerate.Pixels)))
                 {
                     layerToGenerate.Bitrate = layerToGenerate.Bitrate - 1;
                 }
             }

            foreach (ResolutionInfo layerToGenerate in orderedLayersToGenerate.Where(layerToGenerate => !HasExistingStepWithinTolerance(layerToGenerate.Width, layerToGenerate.Height, layerToGenerate.Bitrate, bitrateTolerance)))
             {
                 AddVideoLayer(layerToGenerate.Width, layerToGenerate.Height, layerToGenerate.Bitrate);
             }

            return this;
         }

        private bool HasExistingStepWithinTolerance(int width, int height, int min, double bitrateTolerance)
         {
             Codec codec = Codecs.FirstOrDefault(c => c.Type == "H264Video");
             if (codec == null)
             {
                 return false;
             }
             return codec.H264Layers.Any(layer => layer.Width == width && layer.Height == height && Math.Abs((layer.Bitrate - min) / (double) layer.Bitrate) <= bitrateTolerance);
         }

        public EncodingPreset AddVideoLayer(int width, int height, int bitrate)
         {
             H264Layer h264Layer = H264Layer.GetVideoLayer(width, height, bitrate);
             Codec codec = Codecs.FirstOrDefault(c => c.Type == "H264Video");
             if (codec == null)
             {
                 codec = Codec.GetH264Codec();
                 Codecs.Add(codec);
             }

            if (!codec.H264Layers.Any(layer => layer.Width == width && layer.Height == height && layer.Bitrate == bitrate))
             {
                 codec.H264Layers.Add(h264Layer);
             }

            return this;
         }

        public EncodingPreset AddPngThumbnails()
         {
             Codec codec = Codecs.FirstOrDefault(c => c.Type == "PngImage");
             if (codec == null)
             {
                 PngLayer pngLayer = PngLayer.Get640x360Thumbnail();

                Codec thumbnailCodec = Codec.GetPngThumbnailCodec();
                 thumbnailCodec.Start = "00:00:01";
                 thumbnailCodec.Step = "00:00:01";
                 thumbnailCodec.Range = "00:00:58";
                 thumbnailCodec.Type = "PngImage";
                 thumbnailCodec.PngLayers.Add(pngLayer);

                Codecs.Add(thumbnailCodec);

                Outputs.Add(Output.GetPngThumbnailOutput());
             }

            return this;
         }
     }
}

With supporting classes for the collections and other classes:


public class Codec
     {
         private Codec()
         {
         }

        public string KeyFrameInterval { get; set; }
         public List<H264Layer> H264Layers { get; set; }
         public string Type { get; set; }
         public List<PngLayer> PngLayers { get; set; }
         public string Start { get; set; }
         public string Step { get; set; }
         public string Range { get; set; }
         public string Profile { get; set; }
         public int? Channels { get; set; }
         public int? SamplingRate { get; set; }
         public int? Bitrate { get; set; }
         public string Condition { get; set; }

        public static Codec GetH264Codec()
         {
             return new Codec
                    {
                        Type = "H264Video",
                        KeyFrameInterval = "00:00:02",
                        H264Layers = new List<H264Layer>()
                    };
         }

        public static Codec GetNormalAudioCodec()
         {
             return new Codec
                    {
                        Type = "AACAudio",
                        Profile = "AACLC",
                        Channels = 2,
                        SamplingRate = 48000,
                        Bitrate = 128,
                        Condition = "InsertSilenceIfNoAudio"
                    };
         }

        public static Codec GetHDAudioCodec()
         {
             return new Codec
                    {
                        Type = "AACAudio",
                        Profile = "AACLC",
                        Channels = 6,
                        SamplingRate = 48000,
                        Bitrate = 384,
                        Condition = "InsertSilenceIfNoAudio"
                    };
         }

        public static Codec GetPngThumbnailCodec()
         {
             return new Codec
                    {
                        Type = "PngImage",
                        Start = "00:00:01",
                        Step = "00:00:01",
                        Range = "00:00:58",
                        PngLayers = new List<PngLayer>()
                    };
         }
     }

public class Output
  {
      private Output()
      {
      }

     public string FileName { get; set; }
      public Format Format { get; set; }

     public static Output GetMp4Output()
      {
          return new Output
                 {
                     Format = new Format
                              {
                                  Type = "MP4Format"
                              },
                     FileName = "{Basename}_{Width}x{Height}_{VideoBitrate}{Extension}"
                 };
      }

     public static Output GetPngThumbnailOutput()
      {
          return new Output
                 {
                     Format = new Format
                              {
                                  Type = "PngFormat"
                              },
                     FileName = "{Basename}_{Index}{Extension}"
                 };
      }
  }

public class H264Layer
    {
        private H264Layer()
        {
        }

       public string Profile { get; set; }
        public string Level { get; set; }
        public int Bitrate { get; set; }
        public int MaxBitrate { get; set; }
        public string BufferWindow { get; set; }
        public int Width { get; set; }
        public int Height { get; set; }
        public int BFrames { get; set; }
        public int ReferenceFrames { get; set; }
        public bool AdaptiveBFrame { get; set; }
        public string Type { get; set; }
        public string FrameRate { get; set; }

       public static H264Layer GetVideoLayer(int width, int height, int bitrate)
        {
            return new H264Layer
                   {
                       Profile = "Auto",
                       Level = "auto",
                       Bitrate = bitrate,
                       MaxBitrate = bitrate,
                       BufferWindow = "00:00:05",
                       Width = width,
                       Height = height,
                       BFrames = 3,
                       ReferenceFrames = 3,
                       AdaptiveBFrame = true,
                       Type = "H264Layer",
                       FrameRate = "0/1"
                   };
        }
    }

public class PngLayer
    {
        private PngLayer()
        {
        }

       public string Type { get; set; }
        public int Width { get; set; }
        public int Height { get; set; }

       public static PngLayer Get640x360Thumbnail()
        {
            return new PngLayer
                   {
                       Height = 360,
                       Width = 640,
                       Type = "PngLayer"
                   };
        }
    }

public class Format
    {
        public string Type { get; set; }
    }

a class to hold our original video information to compare to our ideal ladder:

public class ResolutionInfo
    {
        public int Width { get; set; }
        public int Height { get; set; }
        public int Bitrate { get; set; }

       public long Pixels
        {
            get
            {
                return Width * Height;
            }
        }
    }

and an extension method to convert to json properly for this case:

public static class EncodingPresetExtensions
     {
         public static string ToJson(this EncodingPreset preset)
         {
             return JsonConvert.SerializeObject(preset,
                                                new JsonSerializerSettings
                                                {
                                                    NullValueHandling = NullValueHandling.Ignore
                                                });
         }
     }

and finally our ideal bitrate ladder:

public static class BitrateLadder
    {
        private static readonly IList<ResolutionInfo> Ladder = new List<ResolutionInfo>();

       static BitrateLadder()
        {
            Ladder.Add(
                       new ResolutionInfo
                       {
                           Bitrate = 20000,
                           Width = 4096,
                           Height = 2304
                       });
            Ladder.Add(
                       new ResolutionInfo
                       {
                           Bitrate = 18000,
                           Width = 3840,
                           Height = 2160
                       });
            Ladder.Add(
                       new ResolutionInfo
                       {
                           Bitrate = 16000,
                           Width = 3840,
                           Height = 2160
                       });
            Ladder.Add(
                       new ResolutionInfo
                       {
                           Bitrate = 14000,
                           Width = 3840,
                           Height = 2160
                       });
            Ladder.Add(
                       new ResolutionInfo
                       {
                           Bitrate = 12000,
                           Width = 2560,
                           Height = 1440
                       });
            Ladder.Add(
                       new ResolutionInfo
                       {
                           Bitrate = 10000,
                           Width = 2560,
                           Height = 1440
                       });
            Ladder.Add(
                       new ResolutionInfo
                       {
                           Bitrate = 8000,
                           Width = 2560,
                           Height = 1440
                       });
            Ladder.Add(
                       new ResolutionInfo
                       {
                           Bitrate = 6000,
                           Width = 1920,
                           Height = 1080
                       });
            Ladder.Add(
                       new ResolutionInfo
                       {
                           Bitrate = 4700,
                           Width = 1920,
                           Height = 1080
                       });
            Ladder.Add(
                       new ResolutionInfo
                       {
                           Bitrate = 3400,
                           Width = 1280,
                           Height = 720
                       });
            Ladder.Add(
                       new ResolutionInfo
                       {
                           Bitrate = 1500,
                           Width = 960,
                           Height = 540
                       });
            Ladder.Add(
                       new ResolutionInfo
                       {
                           Bitrate = 1000,
                           Width = 640,
                           Height = 360
                       });
        }

       /// <inheritdoc />
        public static IList<ResolutionInfo> OrderedLadder
        {
            get
            {
                return Ladder.OrderBy(pair => pair.Pixels).ThenBy(info => info.Bitrate).ToList();
            }
        }
    }

Note that I have set some defaults in these classes for my particular use case.

So let’s talk about the AddBitrateLadder function:

It takes in the width, height, and bitrate from the origin media file so as not to wastefully, “up-encode” it.  Then, it creates a ladder making the “top” layer the original specs, and steps down from there using our ideal bitrate ladder as a guide.  I should also note that AMS keys off the bitrate, so you can not have 2 different resolutions with the same bitrate, and that is why there is code in that method to merely subtract 1 from each bitrate to make them unique if the original video quality is too low to fit into our specified ladder.  Lastly, it includes a tolerance so that you don’t create 2 layers that are virtually identical.

So now I can use this to generate me a custom bitrate ladder with normal audio and thumbnails, for example:

EncodingPreset.GetBaseEncodingPreset()
.AddNormalAudio()
.AddPngThumbnails()
.AddBitrateLadder(playlistItem.AVFile.Width, playlistItem.AVFile.Height, playlistItem.AVFile.Bitrate);

or HD Audio with no thumbnails:

EncodingPreset.GetBaseEncodingPreset()
.AddHDAudio()
.AddBitrateLadder(playlistItem.AVFile.Width, playlistItem.AVFile.Height, playlistItem.AVFile.Bitrate);]

etc. etc.

And it’s totally testable:

[TestMethod]
       public void CalcLayers1920x1080at266()
       {
           List<H264Layer> layers = CalcLayers(1920, 1080, 266);
           Assert.AreEqual(4, layers.Count);

           H264Layer layer1 = layers[0];
           Assert.AreEqual(263, layer1.Bitrate);
           Assert.AreEqual(360, layer1.Height);
           Assert.AreEqual(640, layer1.Width);

           H264Layer layer2 = layers[1];
           Assert.AreEqual(264, layer2.Bitrate);
           Assert.AreEqual(540, layer2.Height);
           Assert.AreEqual(960, layer2.Width);

           H264Layer layer3 = layers[2];
           Assert.AreEqual(265, layer3.Bitrate);
           Assert.AreEqual(720, layer3.Height);
           Assert.AreEqual(1280, layer3.Width);

           H264Layer layer4 = layers[3];
           Assert.AreEqual(266, layer4.Bitrate);
           Assert.AreEqual(1080, layer4.Height);
           Assert.AreEqual(1920, layer4.Width);
       }

 private static List<H264Layer> CalcLayers(int width, int height, int bitrate)
       {
           EncodingPreset preset1 = EncodingPreset.GetBaseEncodingPreset()
                                                  .AddNormalAudio()
                                                  .AddPngThumbnails()
                                                  .AddBitrateLadder(width, height, bitrate);
           return preset1.Codecs.Where(codec => codec.Type == "H264Video")
                         .SelectMany(codec => codec.H264Layers)
                         .ToList();
       }

Then, when it is time to submit my job, I can:

ITask task = job.Tasks.AddNew(“My encoding task”, processor, myPreset.ToJson(), TaskOptions.None);

Boom! Now we have the power of Adaptive Streaming with the benefit of more control over the ideal ladder, as well as other functions of AMS.

Leave a Comment

Auto scaling Media Reserved Units in Azure Media Services

When you spin up an Azure Media Services instance in Azure, you are prompted with a choice:  How many Media Reserved Units do you want?  and what horsepower do you want behind them?

Well, that exactly does that mean?

Reserving a Unit means that when you submit a job to Media Services, you wont go in a public queue in order for your submitted job to start.  This is important, because if the public queue is busy, it could take quite a while for your job to get picked up.  If you have all the time in the world for your job to complete, this isn’t a big deal, but if you are like me with a customer waiting on the job, speed is a priority.  You can choose from 1-10 reserved units (you can request  more via a support request), and they come at a cost.  Also, when you reserve a unit, it has be a specific speed (S1, S2, or S3).

image

So if you want to have 10 reserved units at all times, and you want S3 so the job completes the fastest that Azure offers, that is 80 cents an hour, and that can add up over time.  I should also note that you can NOT reserve zero S2 or S3 units.  If you want to be in the public pool, it has to be S1.  Therefore, you are 4 cents an hour at the very least if you want to have an immediate response time of your jobs by reserving one S1.  I should also note that if you made a support request to get more than 10 units, when you change the speed of those reserved units, the MaxReservableUnits gets reset to 10, and your support request is essentially lost.  I have spoken with Azure support on this, and while they don’t call it a bug, it is something they are addressing in a future release of AMS.

So, the solution I came up with was to auto scale our units with C#.

When a message is sent to my worker role to work with Azure Media Services, I reserve (currently reserved units + 1) S3 units, and when it is done I decrement one S3 unit.  When I hit 0 units, I set the speed back to S1 (because remember you can only have zero units if you are set to S1)

internal static async Task ReserveMediaEncodingUnit(MediaContextBase context, int amount)
      {
          if (ConfigurationProvider.AutoScaleMRU())
          {
              IEncodingReservedUnit encodingReservedUnit = context.EncodingReservedUnits.FirstOrDefault(); //there is always only one of these (https://github.com/Azure/azure-sdk-for-media-services/blob/dev/test/net/Scenario/EncodingReservedUnitDataTests.cs)
              if (encodingReservedUnit != null)
              {
                   encodingReservedUnit.CurrentReservedUnits = Math.Min(amount,
                                                                       ConfigurationProvider.MaxMRUProvisioned() == 0
                                                                           ? encodingReservedUnit.MaxReservableUnits
                                                                           : ConfigurationProvider.MaxMRUProvisioned());
                   encodingReservedUnit.ReservedUnitType = ReservedUnitType.Premium;
                   await encodingReservedUnit.UpdateAsync();
               }
           }
       }

ConfigurationProvider.MaxMRUProvisioned() is a setting I have that is equal to 10.  I did that because I initially put in the service request to get more than 10, only to find out it gets reset back to 10 if you change the speed.  If Microsoft changes this behavior, I can set my setting to 0 and user their variable MaxReservedUnits, without any code changes.

Deallocating units:


 internal static async Task DeallocateMediaEncodingUnit(MediaContextBase context, int amount)
       {
           if (ConfigurationProvider.AutoScaleMRU())
           {
               IEncodingReservedUnit encodingReservedUnit = context.EncodingReservedUnits.FirstOrDefault(); //there is always only one of these (https://github.com/Azure/azure-sdk-for-media-services/blob/dev/test/net/Scenario/EncodingReservedUnitDataTests.cs)

              if (encodingReservedUnit != null)
               {
                   encodingReservedUnit.CurrentReservedUnits = Math.Max(0, amount);
                   encodingReservedUnit.ReservedUnitType = encodingReservedUnit.CurrentReservedUnits == 0
                                                               ? ReservedUnitType.Basic
                                                               : ReservedUnitType.Premium;

                  await encodingReservedUnit.UpdateAsync();
               }
           }
       }

If I hit 0 units I can reset:


    private static async Task ResetMediaEncodingUnits(MediaContextBase context)
       {
           if (ConfigurationProvider.AutoScaleMRU())
           {
               IEncodingReservedUnit encodingReservedUnit = context.EncodingReservedUnits.FirstOrDefault(); //there is always only one of these (https://github.com/Azure/azure-sdk-for-media-services/blob/dev/test/net/Scenario/EncodingReservedUnitDataTests.cs)

              if (encodingReservedUnit != null)
               {
                   encodingReservedUnit.CurrentReservedUnits = 0;
                   encodingReservedUnit.ReservedUnitType = ReservedUnitType.Basic;
                   await encodingReservedUnit.UpdateAsync();
               }
           }
       }

So now, when my users aren’t transcoding anything, and my AMS instance is sitting idle, I will incur no cost.  And, when they submit a job, I allocate a unit to avoid going to the public pool and the job gets submitted right away and completed with premium speeds.  I can’t guarantee this hack will work forever; when speaking with MS they told me this code has prompted them to think about how reserved units work in AMS, and may change this behavior in the future.

Happy transcoding!

3 Comments

Automating Publish of UWP Application to the Windows Store

You have published your app to the store, hooray!  Now you want to automate that deployment with VSTS…

If you are having issues with Microsoft’s documentation to accomplish this task, here is a summary of how I got it to work. (I should note that you must have an app in the store manually first for this to work).

1.  Go to your Dev Center Dashboard (https://developer.microsoft.com/en-us/dashboard/apps/overview).

2.  Click the gear icon in the top right hand corner > Manage Users

3.  “Add Azure AD Application” > “New Azure AD Application”

4.  Give it a name, like “Windows Store Connection”, the reply URL and App ID URL can be anything at this stage.  IMPORTANT for it to be part of the Developer Role so that this can publish to the Store.

image

5.  Click Save, and you will be taken to a confirmation page.  Click Manage Users to see your newly created application in the grid with a guid.  Click that one to edit it.

image

6.  Under Keys, click Add New Key.  Make note of the ClientId, Key, and Azure Tenant Id, you will not be able to see that key again after you leave this page. Upon confirmation, click Manage Users to go back to your list, and then click on the Connection again to confirm that it looks like this:

image

Now we move on to the build step.

1.  Add Step Windows Store – Publish

2.  For the Service Endpoint, click New

Name your connection, something like “WindowsStoreConnection”

Windows Store API Url: https://manage.devcenter.microsoft.com

Azure Tenant Id: what you noted from your creation of the Azure AD Application, or you can find it in the portal (https://portal.azure.com), clicking on the Azure Active Directory > Properties > Directory ID

ClientID: what you noted from the creation of the Azure AD Application

Client Secret: your key that you noted from the key creation of the Azure AD Application

 image

3.  Click OK and choose your newly created service endpoint from the dropdown

4.  Application identification method: ID

5.  Application ID: get this from your Dev Center Dashboard > App Management >  App Identity > Store ID

Now, when your run this build step, it will publish your app to the store and poll the service until it is finished (so keep in mind this could consume one of your build agents for up to 3 business days)

image

TL;DR

The MS docs led me to believe that I could create my Azure AD Application from the portal via the App Registrations.  When I did that, I got the dreaded “503 Service Unavailable” error on my build publish step.  The trick was to create the Azure AD Application from the Windows Dev Center, give it Developer permissions, and tie that application back to my Windows Dev Center connection endpoint.

2 Comments

Creating an snk for signing your assemblies with Visual Studio

There are a number of reasons you may (or may not) want to sign your assemblies, but if you do, here is a simple way of doing it in Visual Studio.

  • Create a snk file by opening a Visual Studio command prompt as Administrator <—IMPORTANT (https://msdn.microsoft.com/en-us/library/ms229859%28v=vs.110%29.aspx)
    • sn -k <YOUR SNK FILE NAME>.snk
  • Then create a Public Key
    • sn -p <YOUR SNK FILE NAME>.snk <YOUR PUBLIC KEY FILE NAME>.PublicKey
  • Get your Public Key Token
    • sn -tp <YOUR PUBLIC KEY FILE NAME>.PublicKey
    • this will output your public key and token to the console, make note of it

Full output from the console will look like this:

image

  • Next, go to the properties of the project containing your assembly you want to sign, and click on the Signing tab.
  • Check Sign the assembly
  • Click the dropdown and Browse to the newly created snk file that you created in Step 1

image

The reason you want to note your public key and public key token is for use in your app.config or for InternalsVisibleTo.

For example, if the assembly you have signed needs to be specified in an InternalsVisibleTo in the assemblyinfo file, you would specify it like this:

<assembly: InternalsVisibleTo("MySignedAssemblyName, PublicKey=<font style="background-color: #ffff00">0024000004800000940000000602000000240000525341310004000001000100155b8d9138457a0be37b064f4f0fa70ceb948f08a7855122f1d6fe9cb89e74b68d60853358a061482d5e62423881caf1cf276d82b11a2e6075939181ab9e1c3dadfcf23082b04d15fb5f9ca20da5bc99b29f830e5c5d23ae9d3dee6f609d0980ed8ba584f348d48921055e13e66c987f5c5712e15285235cb649f0a1e65c0bb2</font>") />

Or, if you were referencing the assembly in your app.config for a custom Logging handler using Enterprise Library, it would look like this:

<exceptionTypes>
    <add name="All Exceptions"
               type="System.Exception, mscorlib, Version=4.0.0.0, Culture=neutral, PublicKeyToken=b77a5c561934e089"
               postHandlingAction="NotifyRethrow">
        <exceptionHandlers>
            <add
                type="MyCustomLogExceptionHandlerClassName, MySignedCustomLogHandlerAssemblyName, Culture=neutral, PublicKeyToken=<font style="background-color: #ffff00">0b4def2ce7bdd21a</font>"
                name="LogExceptionHandler" />
        </exceptionHandlers>
    </add>
</exceptionTypes>
1 Comment

Strongly Typing TempData in your MVC Application with Extension Methods

As I’ve stated before, and for those that know me, when working with C# I try to use the compiler as often as I can and keep things strongly typed.  When I started working in MVC, I didn’t like the fact that TempData was defined like this:

public class TempDataDictionary : IDictionary<string, object>, ICollection<KeyValuePair<string, object>>, IEnumerable<KeyValuePair<string, object>>, IEnumerable

While TempData and ViewData being potentially valuable things, <string, object>, really?

Here is how I get around that and use the compiler to my advantage with some simple extension methods:

public static class TempDataExtensions
{
    public static T Get<T>(this TempDataDictionary tempData, string key)
    {
        if (tempData[key] is T)
        {
            var tempDataItem = (T)tempData[key];
            return tempDataItem;
        }
        throw new InvalidCastException(string.Format("Temp Data does not contain type {0} for key {1}", typeof(T), key));
    }
 
    public static void Set<T>(this TempDataDictionary tempData, string key, T value)
    {
        tempData[key] = value;
    }
}

So, in your controller, you can Set to TempData and Get from TempData like this:

public ActionResult Index()
{
    TempData.Set("SomeObjectKey", new SomeObject());
    TempData.Set("SomeBoolKey", true);
    TempData.Set("SomeStringKey", "test");
     
    TempData.Get<SomeObject>("SomeObjectKey"); // returns SomeObject
    TempData.Get<bool>("SomeBoolKey"); // returns a boolean true
    TempData.Get<string>("SomeStringKey"); // returns the string "test"
 
    return View();
}

You can also do the same with ViewData:

public static class ViewDataExtensions
{
    public static T Get<T>(this ViewDataDictionary viewData, string key)
    {
        if (viewData[key] is T)
        {
            var viewDataItem = (T)viewData[key];
            return viewDataItem;
        }
        throw new InvalidCastException(string.Format("View Data does not contain type {0} for key {1}", typeof(T), key));
    }
 
    public static void Set<T>(this ViewDataDictionary viewData, string key, T value)
    {
        viewData[key] = value;
    }
}

I know what you are thinking, this doesn’t stop you from setting TempData the <string, object> way, and you are correct.  To get and set using strong types, you have to have the discipline to use these extension methods.  But, with these tools, you can give yourself a fighting chance.

Leave a Comment

Don’t litter your code with stringly typed settings, mkay?

h9cnk

When using C#, I am kinda a strongly typed bigot and like to use the compiler as much as I can. Since practically every application I have ever worked on has had some sort of setting access from a config file, I felt that there had to be a better way.

So, given this config file:

<?xml version="1.0" encoding="utf-8" ?>
<configuration>
  <appSettings>
    <add key="StringSetting" value="filepath"/>
    <add key="BoolSetting" value="true"/>
    <add key="StringListDelimitedSetting" value="one;two;three"/>
  </appSettings>
</configuration>

I don’t want to litter my code with this everywhere:

//BAD
string value = System.Configuration.ConfigurationManager.AppSettings["StringSetting"];
if (value == "SOMETHING")
{
    //do something
}
  
//WORSE?
string boolValue = System.Configuration.ConfigurationManager.AppSettings["BoolSetting"];
if (boolValue == "YES")
{
    //do something
}
  
//PRODUCES STRONG TYPE BUT EVEN MORE CODE
string someOtherBoolValue = System.Configuration.ConfigurationManager.AppSettings["SomeOtherBoolSetting"];
bool strongBoolValue;
if (Boolean.TryParse(someOtherBoolValue, out strongBoolValue))
{
    if (strongBoolValue)
    {
        //do something
    }
}

So, this is what I do to keep my “stringly” typed settings in one place, strongly typed and make them easily accessible in my code:

public static class AppSettingsExtensions
{
    public static string StringSetting(this NameValueCollection settings)
    {
        string setting = settings["StringSetting"];
        if (setting != null && !string.IsNullOrWhiteSpace(setting))
        {
            return setting;
        }
  
        return string.Empty;
    }
  
    public static bool BoolSetting(this NameValueCollection settings)
    {
        string setting = settings["BoolSetting"];
        if (setting != null && !string.IsNullOrWhiteSpace(setting))
        {
            bool test;
            if (Boolean.TryParse(setting, out test))
            {
                return test;
            }
        }
  
        return false;
    }
  
    public static IEnumerable<string> StringListDelimitedSetting(this NameValueCollection settings)
    {
        string setting = settings["StringListDelimitedSetting"];
        if (setting != null && !string.IsNullOrWhiteSpace(setting))
        {
            return setting.Split(Convert.ToChar(";"), Convert.ToChar(",")).ToList();
        }
  
        return Enumerable.Empty<string>();
    }
}

Accessing settings in code now is simple and gives you a strong type:

//GOOD
string stringSetting = ConfigurationManager.AppSettings.StringSetting();
if (stringSetting == "SOMETHING")
{
    //do something
}
 
//OR
bool boolSetting = ConfigurationManager.AppSettings.BoolSetting();
if (boolSetting)
{
    //do something
}
 
//OR
IEnumerable<string> listSettings = ConfigurationManager.AppSettings.StringListDelimitedSetting();
foreach (string setting in listSettings)
{
    //do something
}

And yes, this works for connections strings as well, just change the type of the extension:

public static class ConnectionStringExtensions
{
    public static string SomeConnectionString(this ConnectionStringSettingsCollection settings)
    {
        ConnectionStringSettings setting = settings["SomeConnectionString"];
        if (setting != null)
        {
            string connectionString = setting.ConnectionString;
            if (!string.IsNullOrWhiteSpace(connectionString))
            {
                return connectionString;
            }
        }
 
        return string.Empty;
    }
}

Accessed like:

string connectionString = ConfigurationManager.ConnectionStrings.SomeConnectionString();

And there you have it, that is a tool I like to keep in my toolbox when working with configuration files.

Leave a Comment

How I missed Codemash 2014 and still learned something

I have to stop having kids around Codemash time, or rather, roughly 9 months before Codemash time.

Every year I attend I usually write a follow up blog post saying how it rejuvenates my love for the profession each year.  I have missed 2 incarnations of Codemash in its history due to my 2 beautiful daughters being born within months of the event (read: WORTH IT), but this year was a little different.  This time I wasn’t able to attend, but I still had that same fire ignited inside me as the years that I was there.

What happened?  Well two things.

1.  I was able to send a young and talented developer in my place that had never been.

2.  The twitter feed.

Let’s start with #1.  I found that ”prepping” someone that was as excited to go as I was the first time made me feel like I was there again.  Make sure you do this, listen to this speaker he/she is great, participate in an open space, eat lots of bacon (he was paleo, so he liked this part), MEET PEOPLE, etc. etc.  In the week upcoming the event, we talked about it everyday.

Secondly, I probably have never used twitter as much as that week, trying to follow along with the events.  Since I was home with the baby and up a lot, I was spending a lot of time at night working on the website for my new business.  I was challenging myself to step out of my .NET comfort zone and build something solely with HTML and JavaScript (maybe it was Codemash from a distance inspiring me).  The problem that I was having was that my first cut at it had a lot of HTML that I was repeating across pages (navigation bar, header, footer, images, etc.) , and I thought there has to be a better way .  My first thought was MVC to deliver a base layout and render a body dynamically, but that broke my rule of trying something new, so that was out.  In comes the Codemash twitter feed where I was hearing a lot about AngularJS, specifically from my friend that went in my place who had attended a class on it and was tweeting about it.  The lights went on.  That will handle my situation AND be something new (but still kinda comfortable since I was used to the controller concept of MVC!).  A couple of nights of reading and doing and viola!, Holeshot Software was finally out there.  Is it spectacular? not really, but it was something I had been wanting to do, it challenged me, and I succeeded, and my business has a landing page with my contact information.

So, all of the reasons that love Codemash so much were still present, even in its absence, including the interaction with the most important  part, the people (only this time it was strictly via Twitter).

Unless something happens around April again, I will see you all next year!

Leave a Comment